The new Authentication Providers will allow the administrator to authenticate the agent using SRW/TK machines against one of these Identities, before launching the application. That way the ThinScale Team has added another layer of security whereas a user has to fully authenticate against an Azure AD, LDAP, Ping Authentication or OKTA to fully launch SRW or TK.
Additionally, the admin can use the below option to rename the device which authenticates with one of the below Providers, inside the management console.
Note: rename a device using Ping is currently not supported

Note: ThinScale does not control any of the settings in either Azure, Ping or Okta. So please talk with your Administrator for more info.
Okta
Before you start creating all the configurations below on the Okta side, remember that the user logged in must be a "Super Admin".
If that is the case, please follow the steps as they are or the Okta Provider may not work as expected.
Application Creation
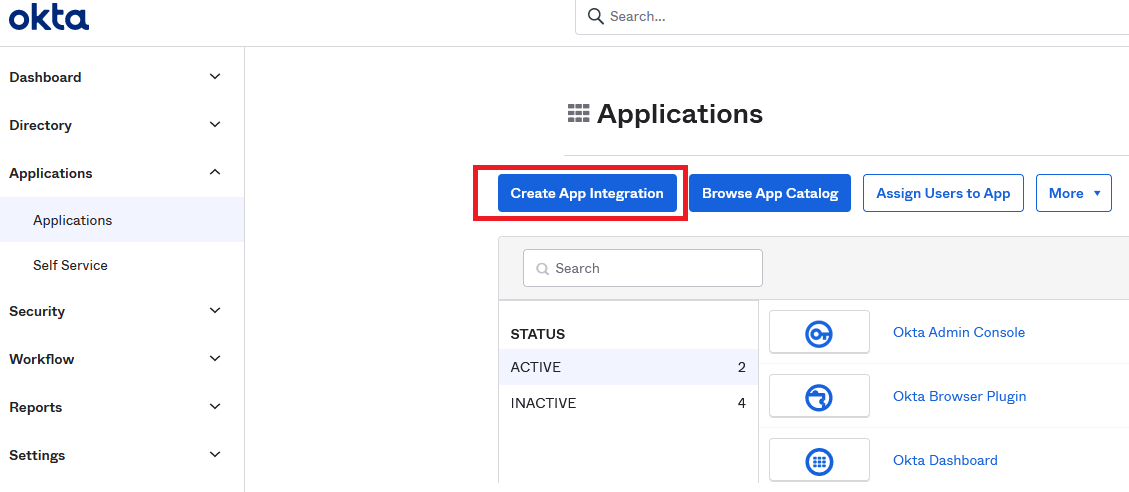
To use The Okta Authentication Provider for both SRW / Console and Server Side Validation, 2 Applications Integration have to be created. Let's create the first one
Log in to your Okta Dashboard and click Create App Registration
SRW - Console Application Integration
For SRW and Console OIDC - OpenID and Native Application Connect must be utilized.
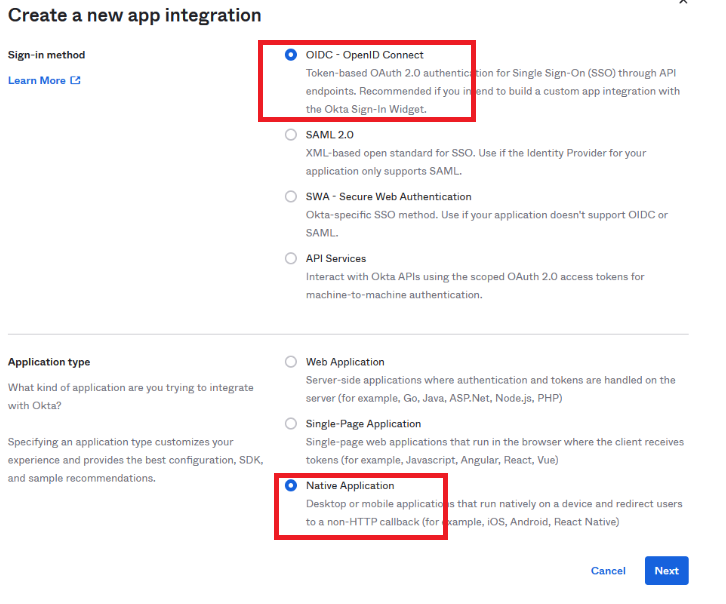
Click Next, give it a name and select the following options. Then click Save
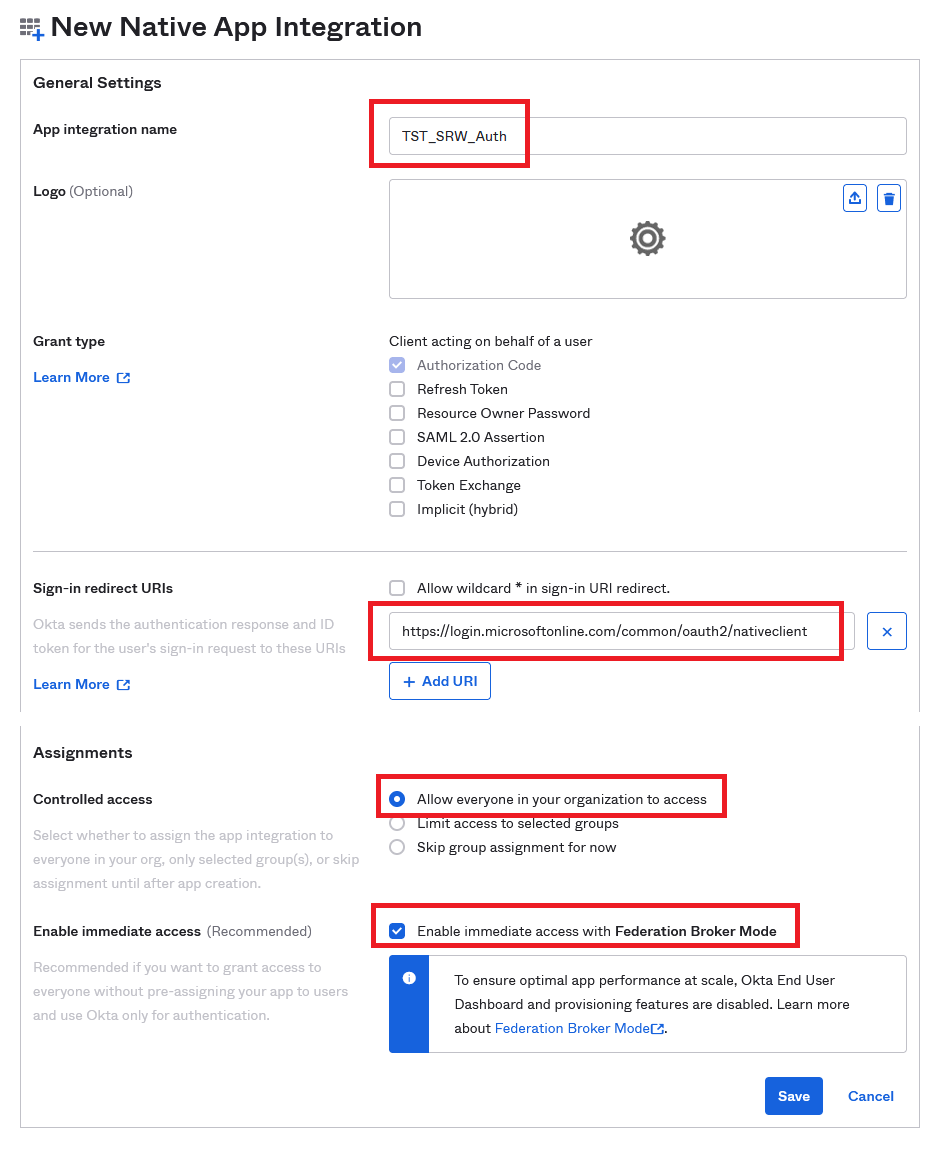
https://login.microsoftonline.com/common/oauth2/nativeclient
Note: redirect URIs can be any web page, via HTTPS, internal to the company. The ThinScale Team used the Azure redirect as an example.
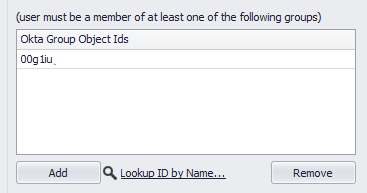
Note: if groups are already created in the Okta Directory, limited access can also be given to this application, as seen below. Once done click Save

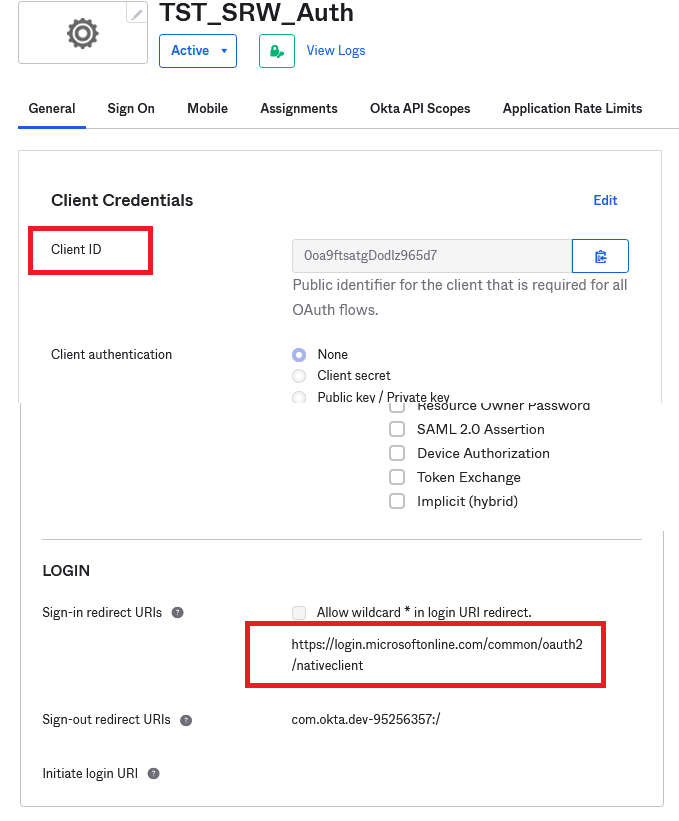
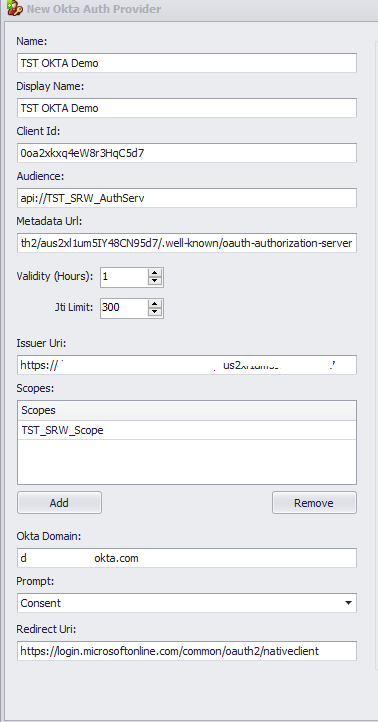
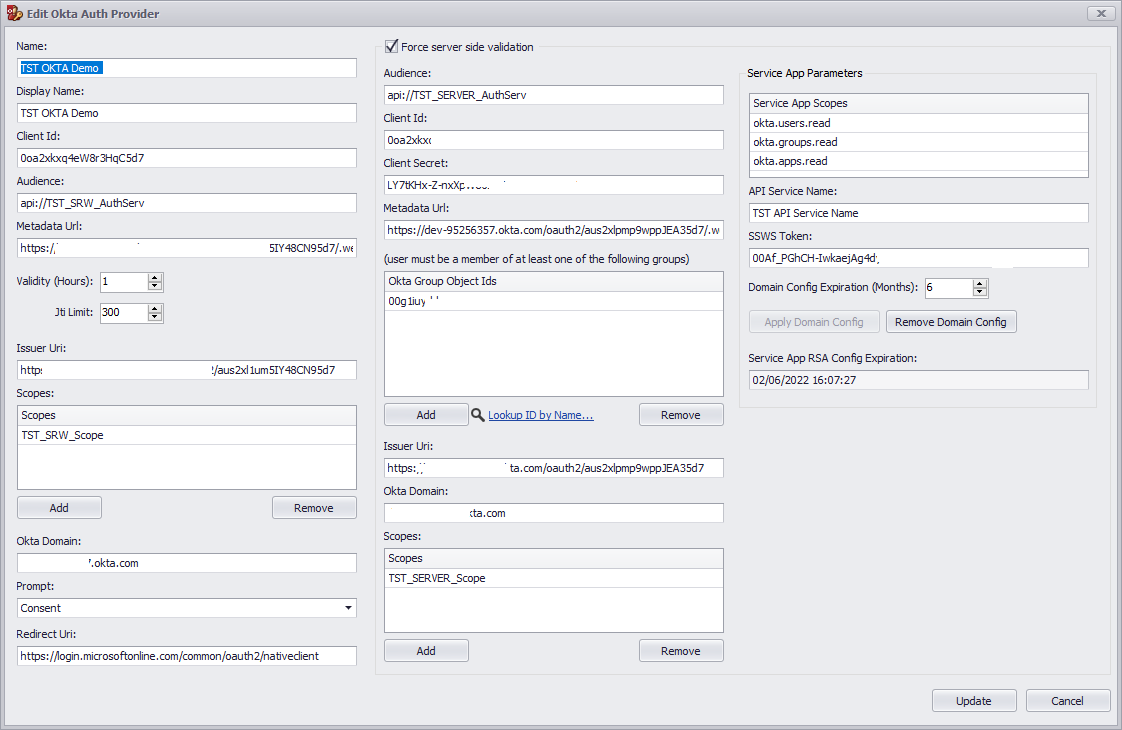
Once done click the Application you just created and then General. Save into a Wordpad, notepad or anything you like the Client ID, the Okta domain and the redirect URI as you will need them inside the ThinScale console.
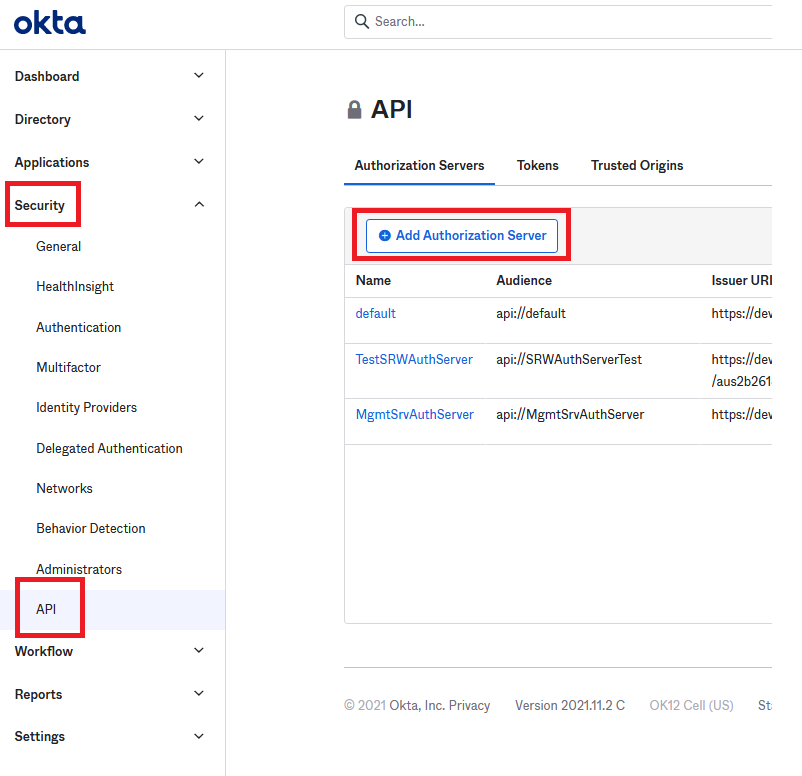
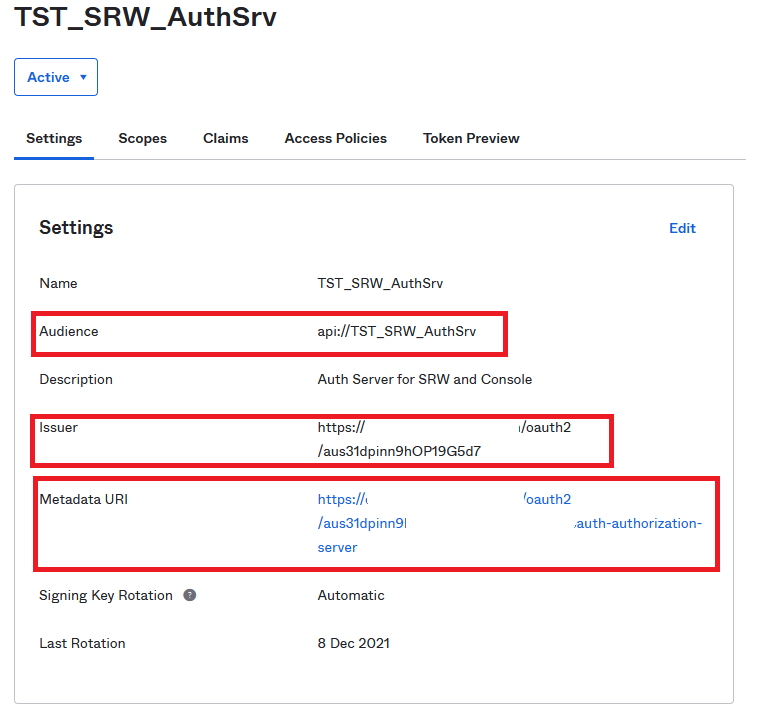
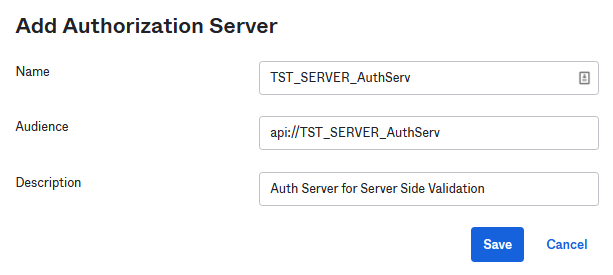
Move Over to Security and API and click Add Authorization Server
Give it a name, an audience and a description. The audience is important so please use the following naming convention
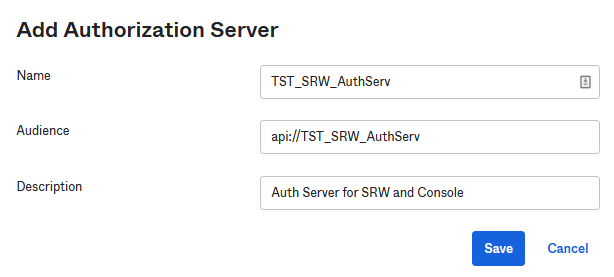
Click Save.
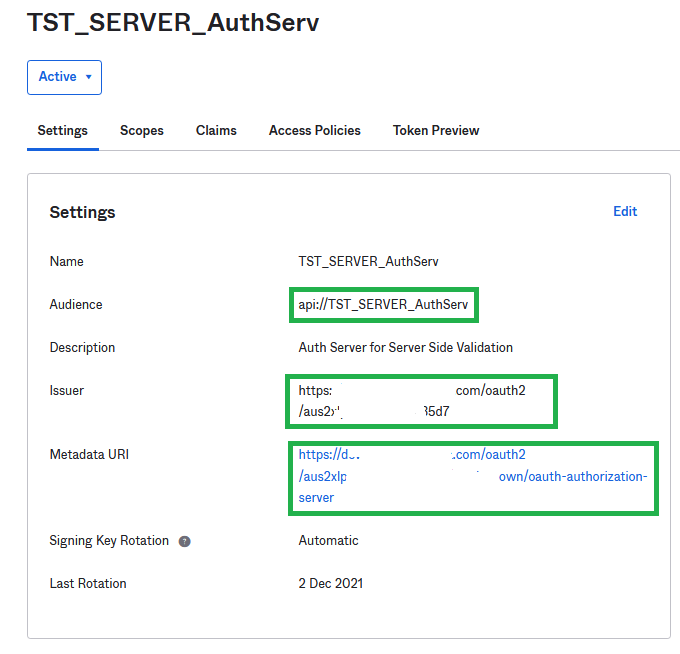
Save into a Wordpad, notepad or anything you like the Audience, the Issuer and the Metadata URL as you will need them in the console.
Move to Scopes
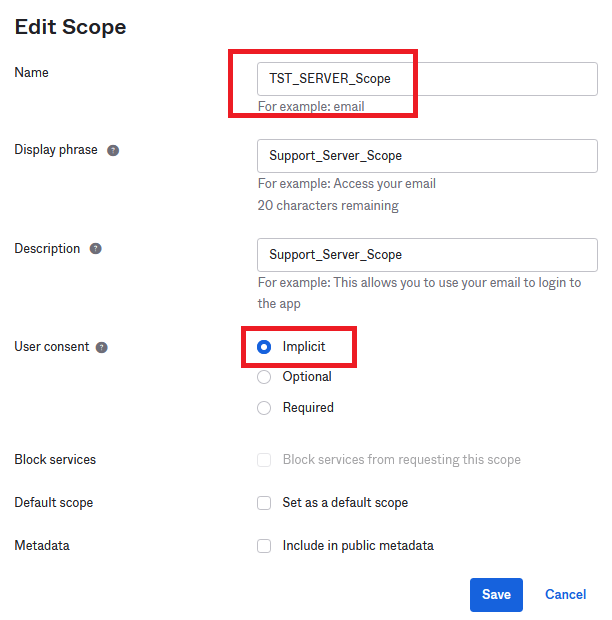
There are already different scopes pre-populated for you, however, a new one is needed for our Auth Provider. Click Add Scope, give it a name and Enable "User consent". Click Create.
Note: This scope is needed inside the Console, so please save the name somewhere

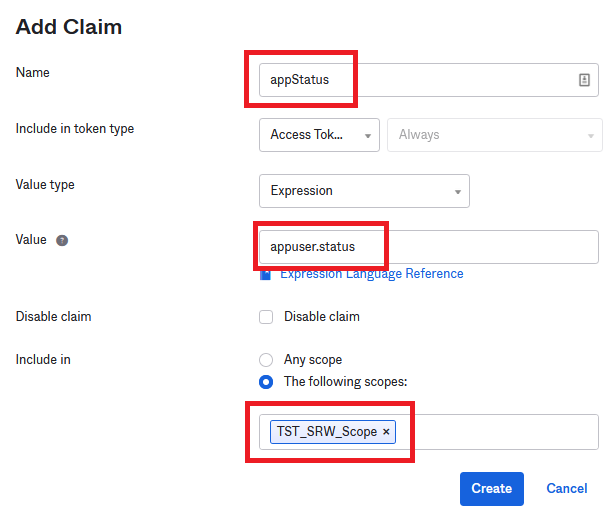
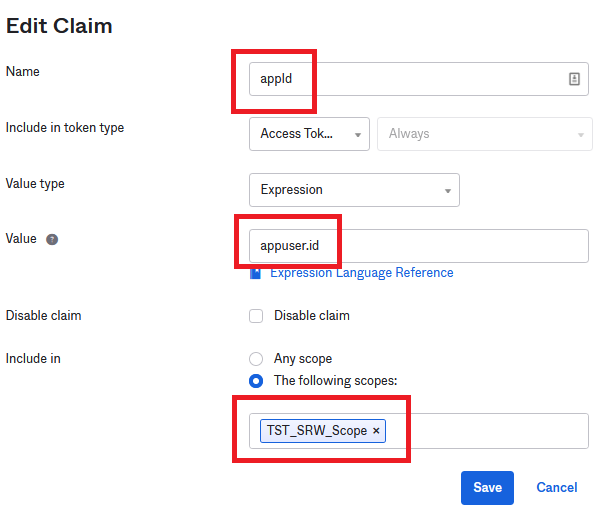
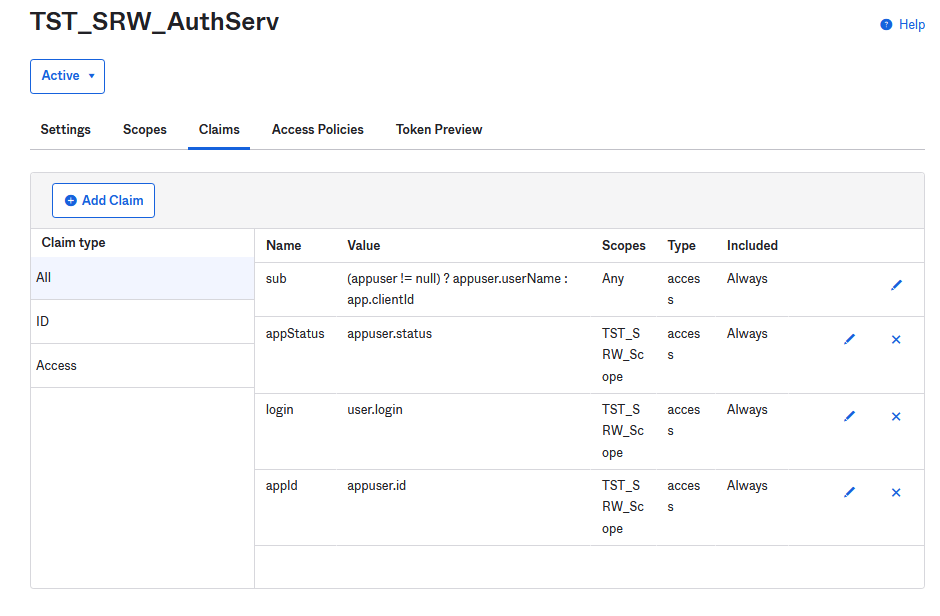
Click Claims.
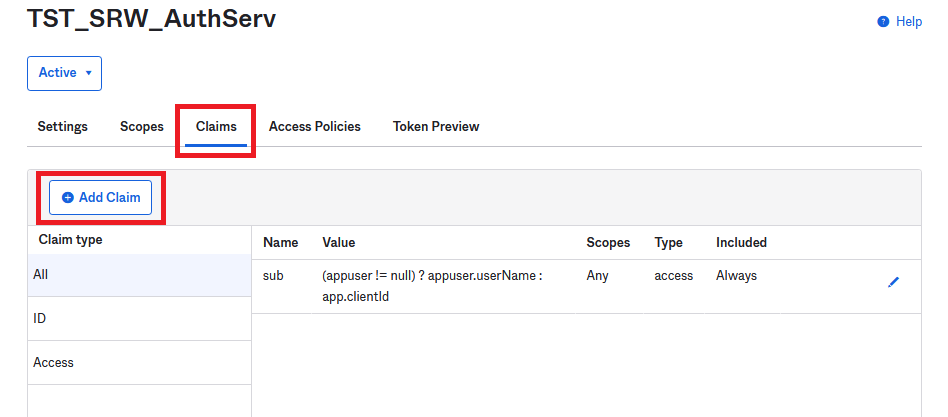
Three claims are needed. Click Add Claims. Claims are case-sensitive so please create all of them the way you see here.
Add the Auth Scope previously created. You can start typing and the name will be pre-populated for you.

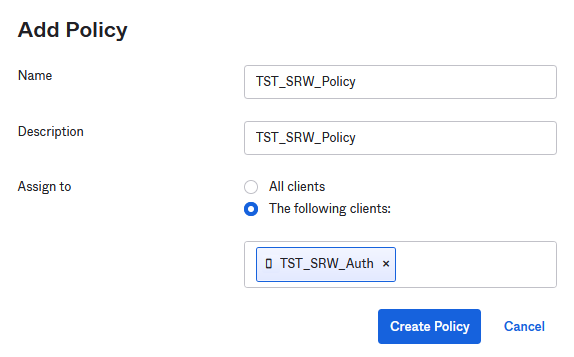
Once done click Access Policies. Add a New Policy and the client name. You can start typing and the name will be pre-populated for you.
Add a Rule within it. Give it a name and enable just the following options.
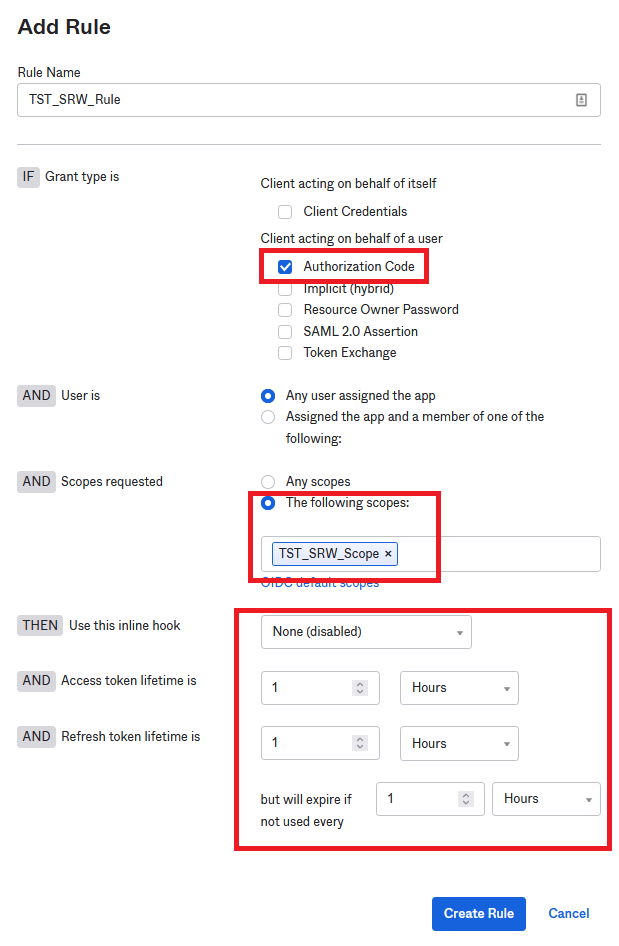
Note: those 3 numbers must match the number on the console, so, please make sure correct values are assigned.
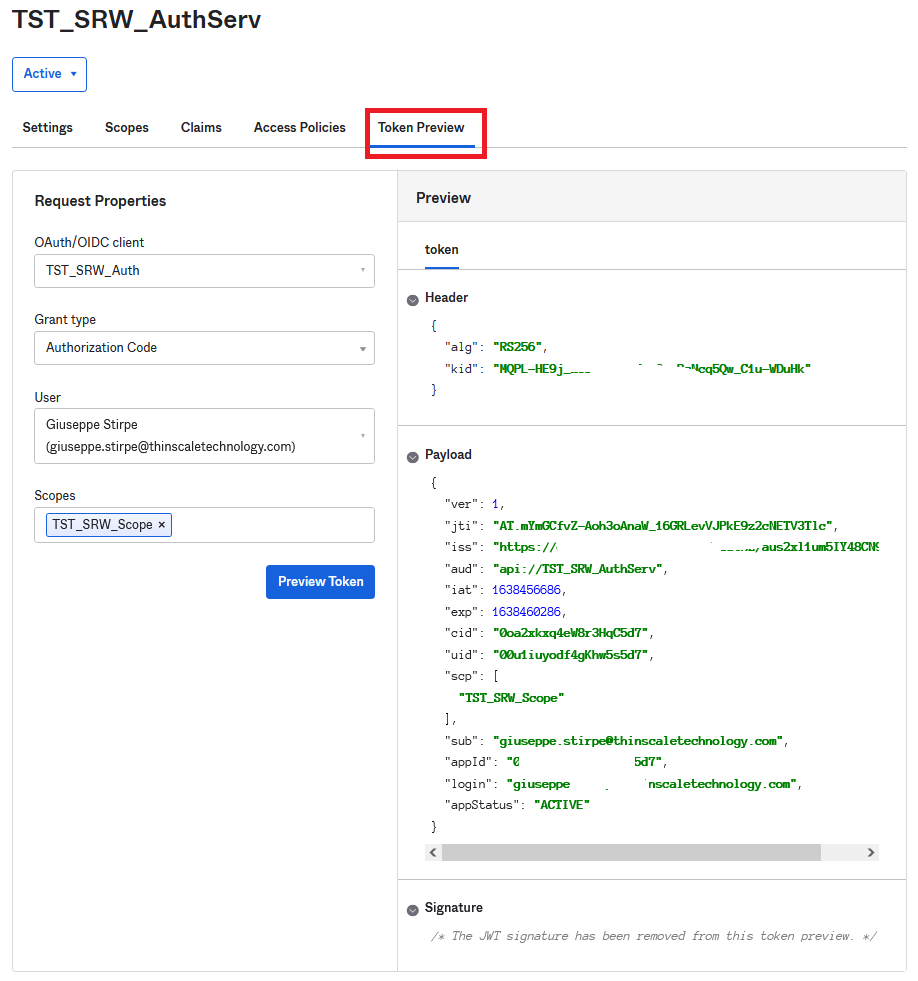
Click Token Review, and if everything is green, you can go to the next step.
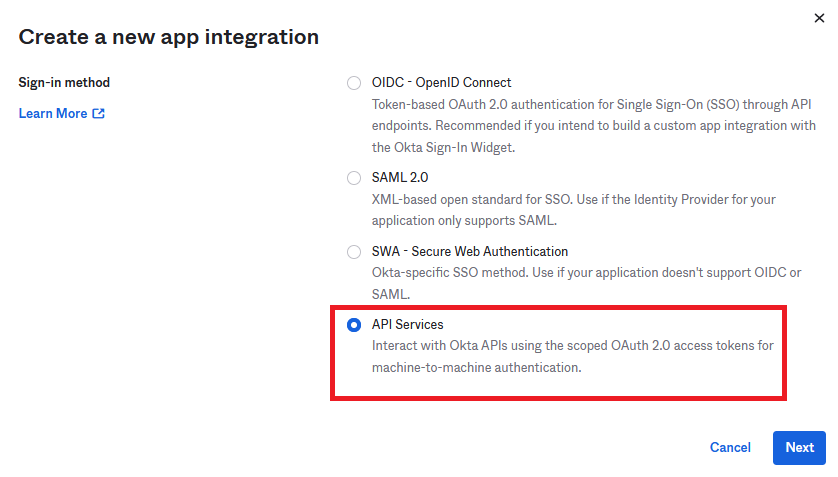
Server Application Integration
Create a new Application. For the Server Integration, API Services must be utilized
Click Next, give it a name and select Save
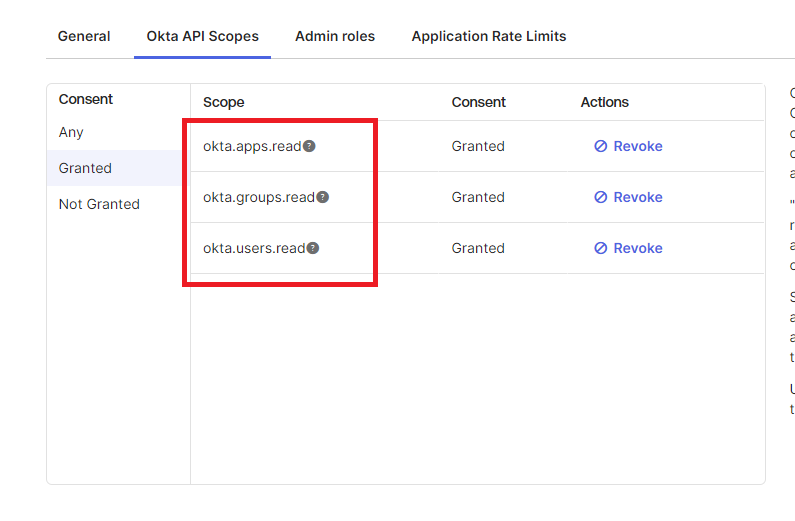
Click the Okta API Scopes Tab and make sure these three scopes are Granted
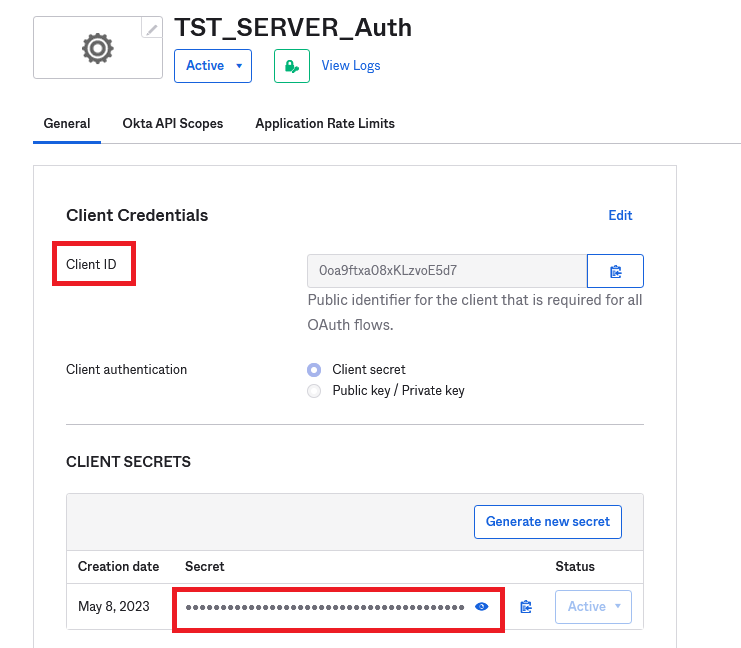
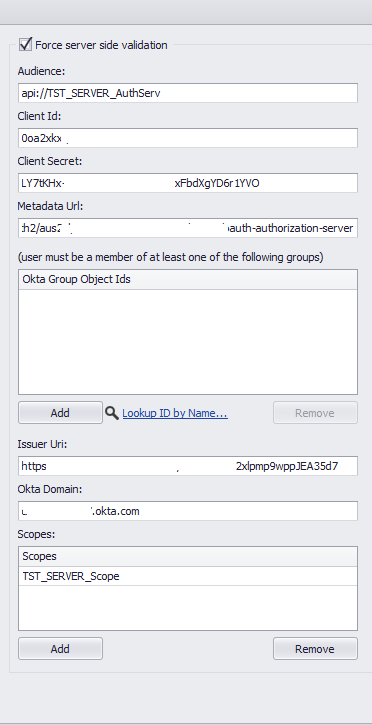
Please note, Client ID, Client Secret and Okta domain are all values that are needed inside the ThinScale Console, so please copy them or make sure you know how to retrieve them later.
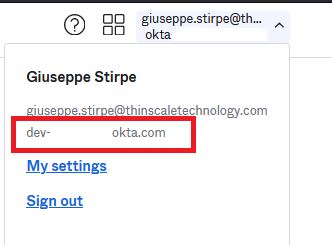
Okta Domain can be retrieved from the account settings on the Top Right Corner
Move Over to Security and API again and click Add Authorization Server. The steps below are similar to the previous one, but there couple of differences.
Please follow them along.
Save into a Wordpad, notepad or anything you like the Audience, the Issuer and the Metadata URL as you will need them in the console.
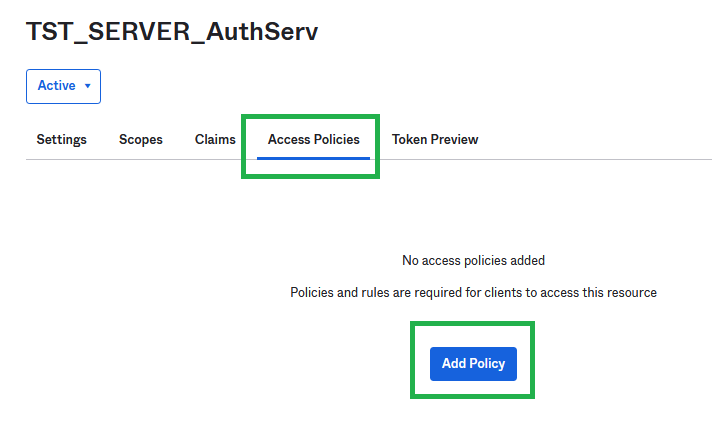
Click Scope and Add a new Scope. The server doesn't need any user consent. So just give it a name, a description and click Create. Once done move to Access Policies. Server Auth doesn't need any Claims.
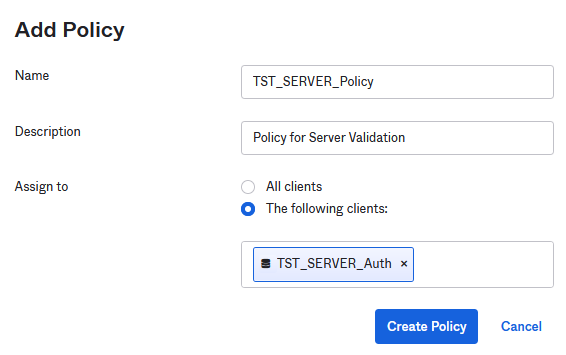
Add a new Policy and like before a new Rule
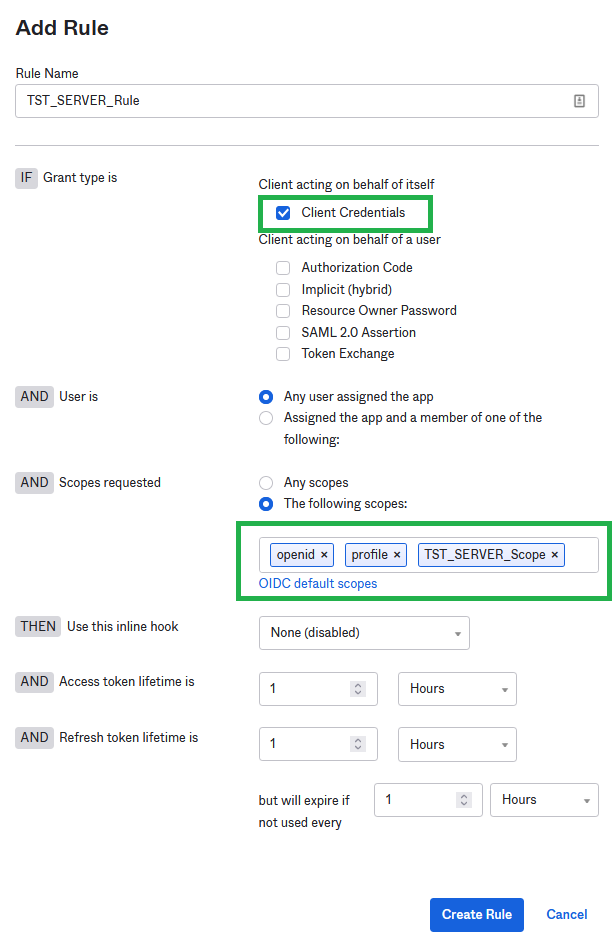
Click Add Rule now.
As you can see scopes and client actions are different from the SRW integration. Please select the below options and click Create Rule
Job done. You can now Preview the token.
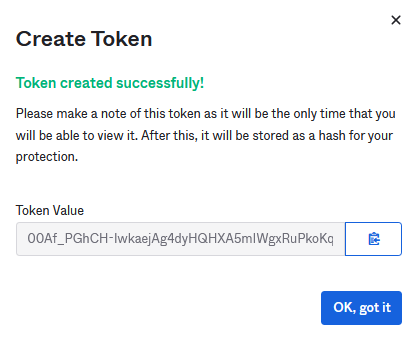
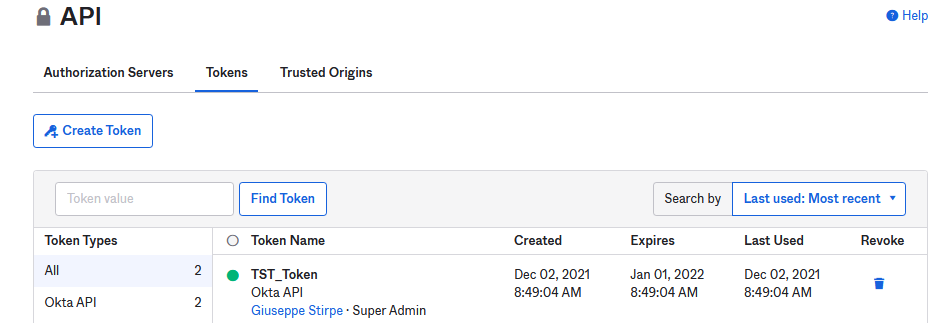
The last missing piece is the SSWS Token. Click on Security API and the Tokens.
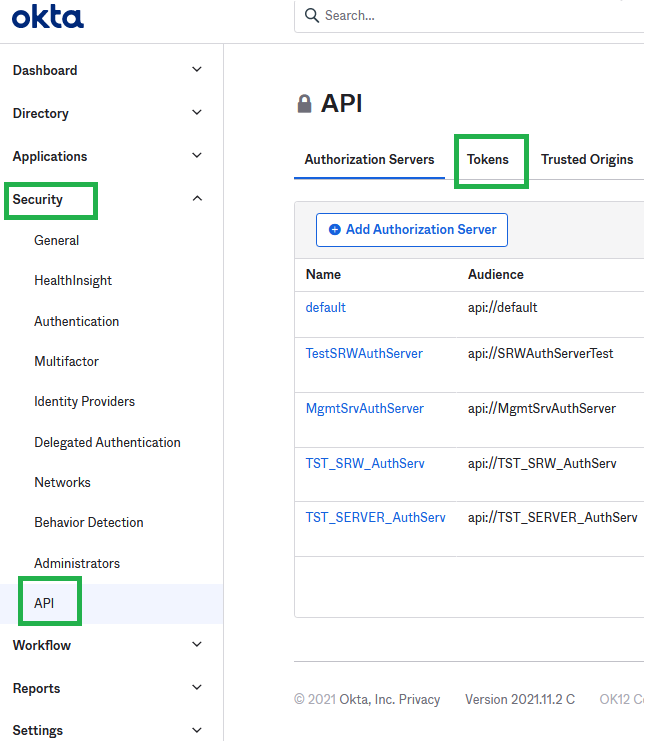
Click Create Token. Give it a name and make sure you copy the value generated.
Note: that the value will only be displayed once and cannot be retrieved.
Your new Okta Authentication Provider back end is now complete.
The last step is to populate the items in the console with all the above information. However, there are some steps you need to follow.
The items on the left side of the Okta dialog belong to the SRW - Console Application Integration
The middle options belong to the Server Integration and finally,
The right-hand side is configurations that a user must perform manually.
SRW
SERVER
Please Note: You cannot lookup ID before the Apply Domain config is enabled.
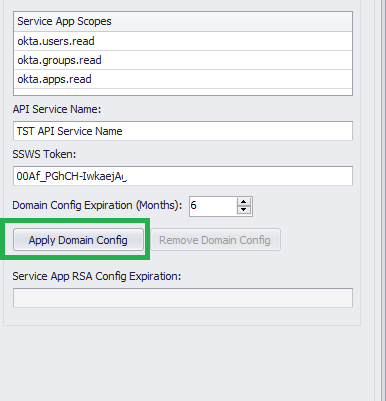
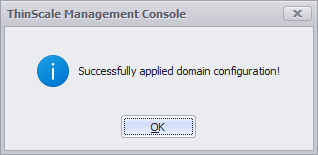
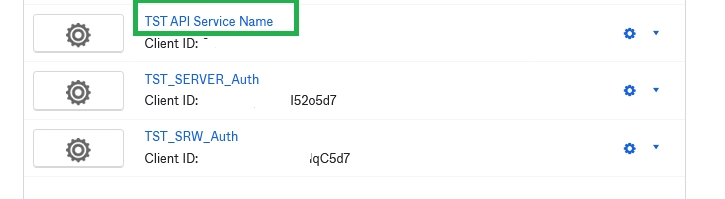
Give the API Service Name a name, type or paste the SSWS Token you copied previously and Click Apply Domain Config. If everything goes well you will see a successful message and a new Application will be displayed inside the Okta Dashboard.
Since December 2023 the Service API App requires at least a Read Only user assigned in the Admin Role.
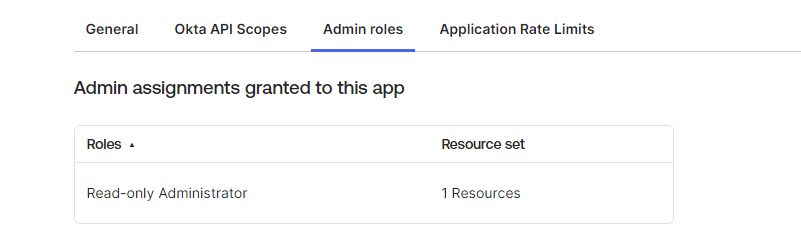
Once done please click Add.
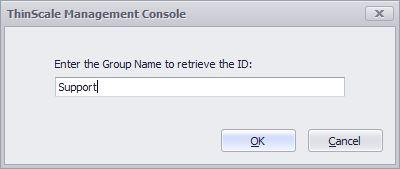
Go back to the console and the Lookup ID by name will be now enabled.
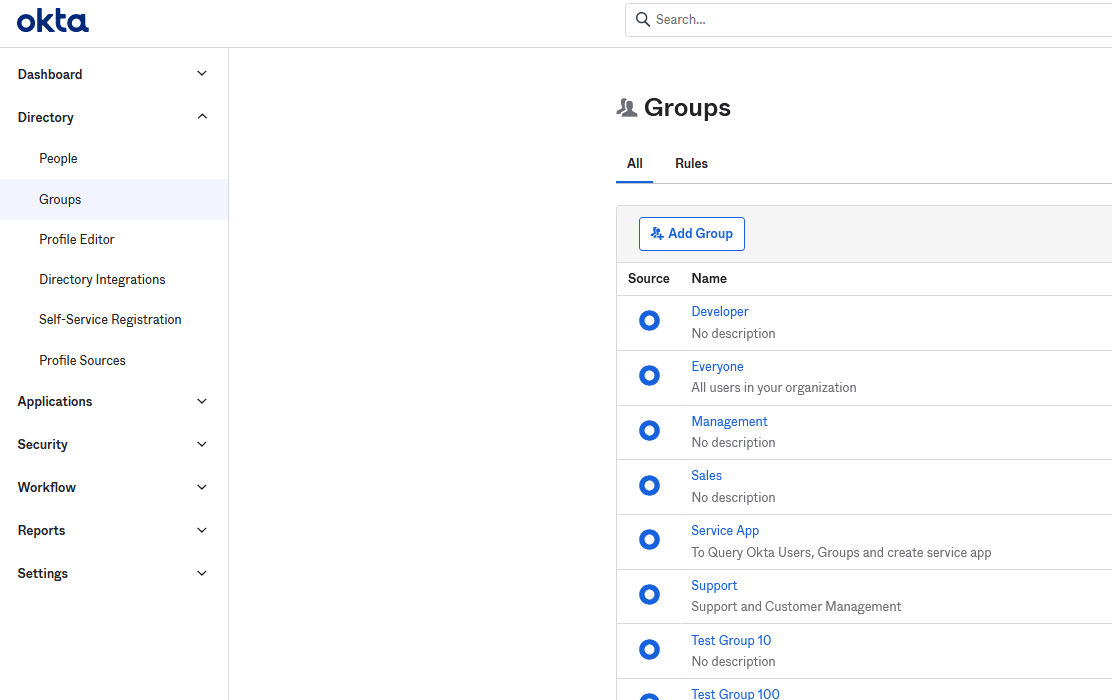
Assuming the Groups exist inside the Okta Dashboard you will be able to search them by name
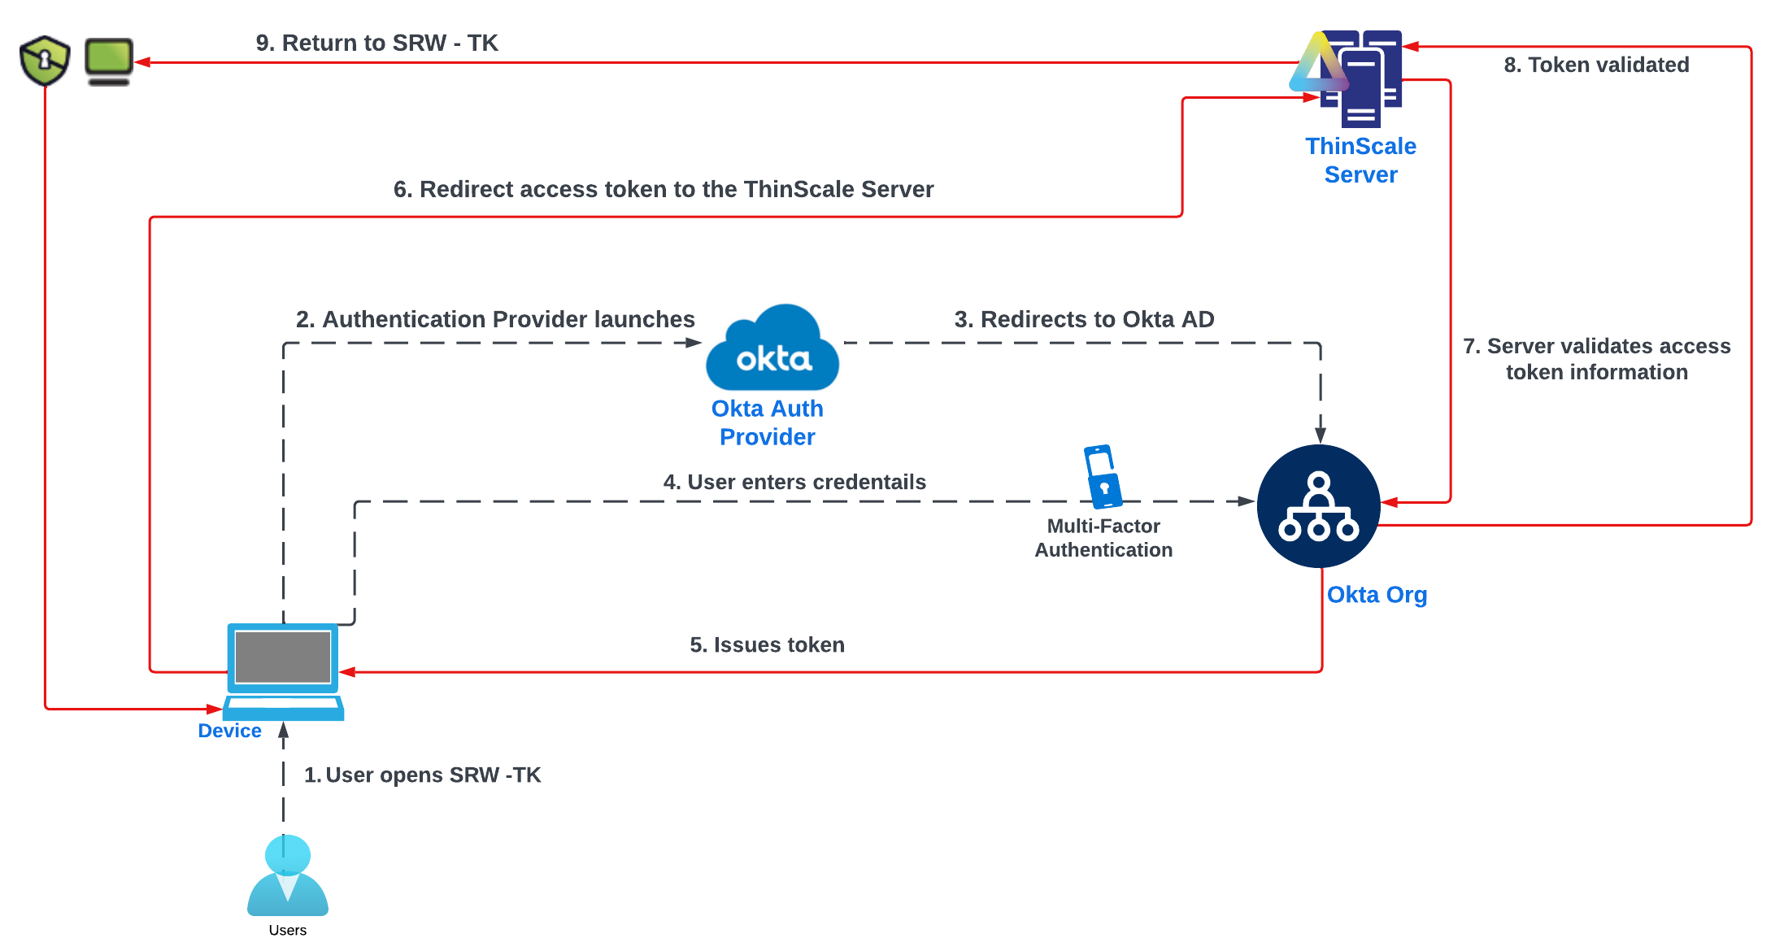
Okta Auth Provider Flow