Managing Anti-virus software
This article will outline the steps for checking and updating your Anti Virus Software for Windows 7, 8 and 10

Written by
Last published at: July 19th, 2019About this article
Another important factor in any PC environment is an antivirus and making sure your PC or laptop is protected from the threat of becoming infected by a virus. There are a number of different antivirus solutions available, some being free of charges such as AVG, or Microsoft Windows Defender which is integrated into the Windows operating system. In this article, we are going to discuss configuring the Microsoft Windows Defender solution.
What is Windows Defender?
Windows Defender, which is now called Windows Defender Antivirus in Windows 10 Creators update, is an integrated anti-malware or anti-virus solution that is an integrated component of the Windows operating system.
Configuring Windows Defender Antivirus for Windows 10
In this section, we are going to describe the process for enabling the Windows Defender feature on Windows 10. Follow the steps below to work through the process of enabling and checking Windows Defender:
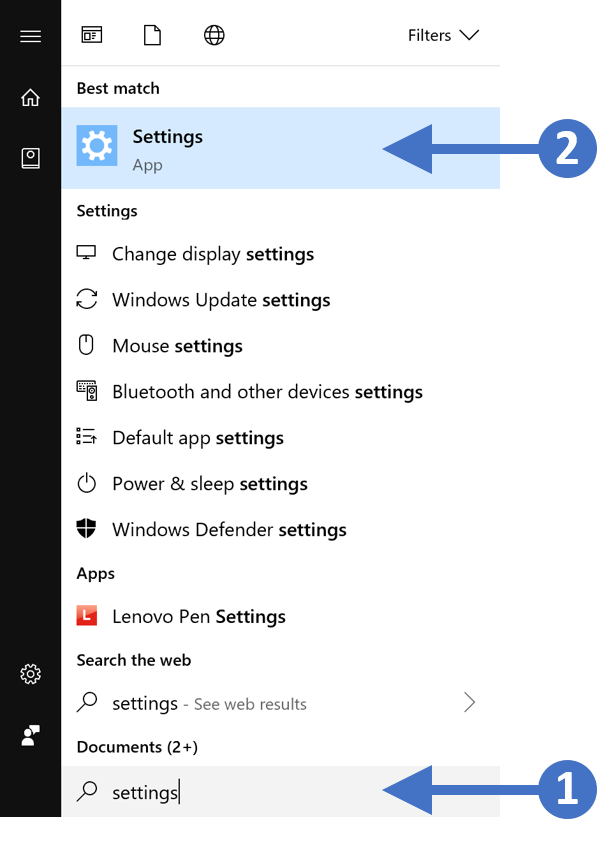
1. Press the Windows key on your keyboard and then start to type in "settings" in the search box highlighted (1). You will then see the Settings App appear at the top of the list as the best match, highlighted (2). Click on the Settings App to launch it as shown in the following screenshot:
2. You will now see the Windows Settings screen as shown in the following screenshot:

3. Now click on System and Security as highlighted (3) in the screenshot above. You will now see the system and security setting as shown in the following screenshot:
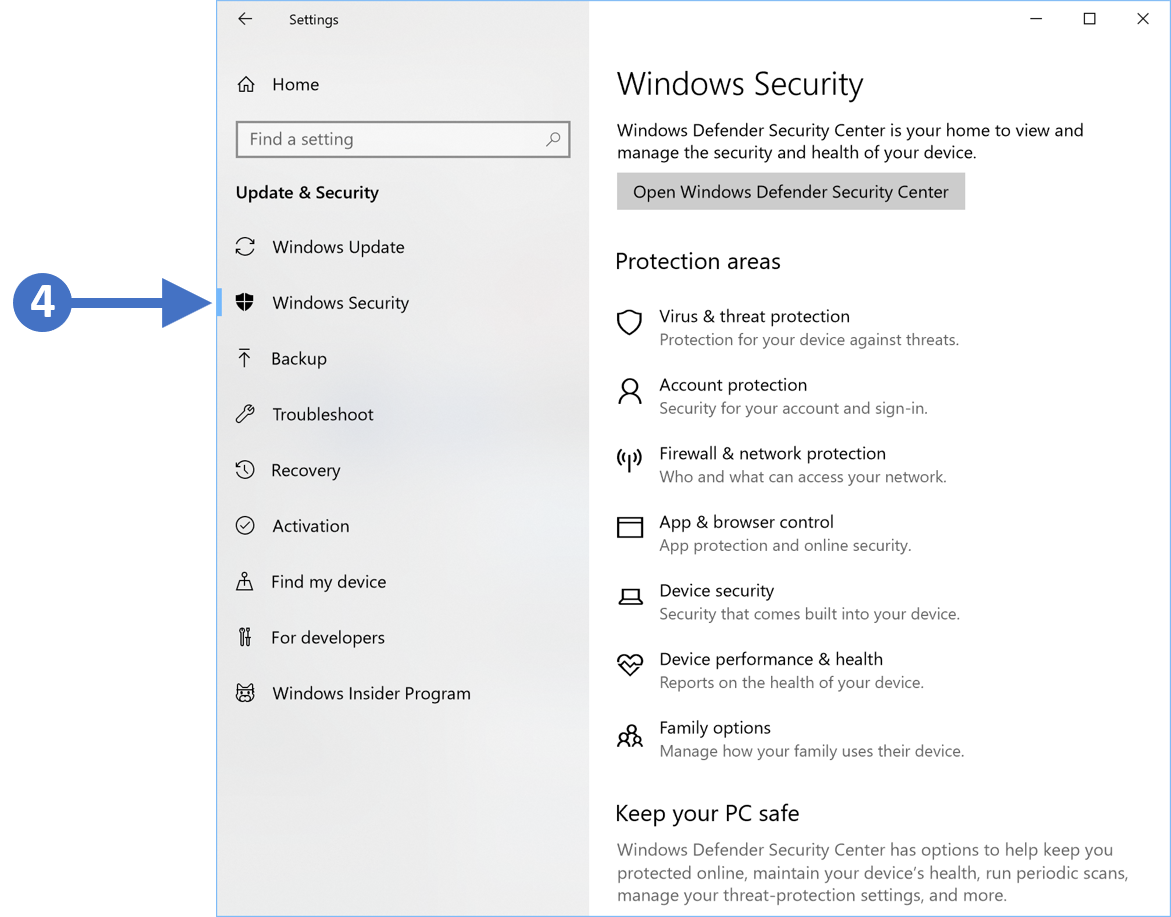
4. Click on the option for Windows Security as highlighted (4) in the above screenshot. You will now see the Windows Security screen as shown in the following screenshot:
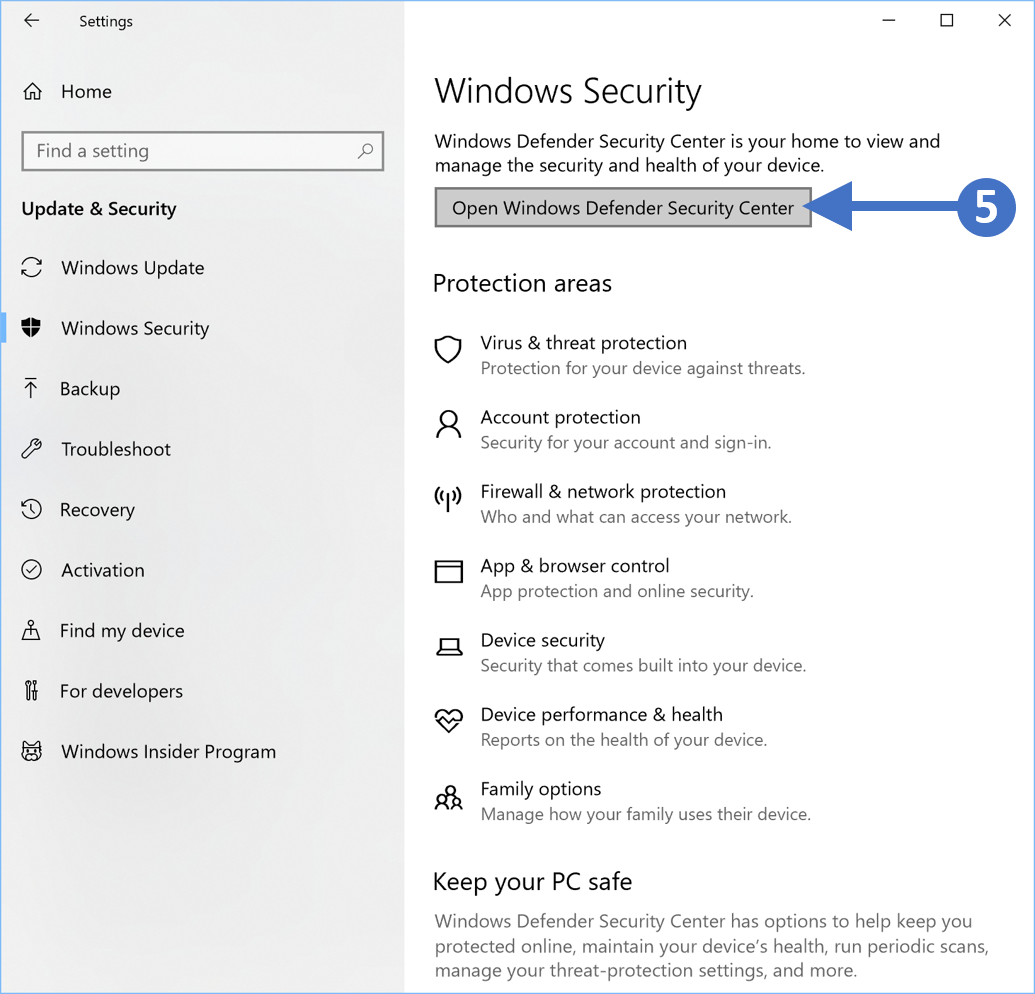
5. Now click on Open Windows Defender Security Center as highlighted (5) in the above screenshot.
6. You will now see the Security at a glance screen as shown in the following screenshot:
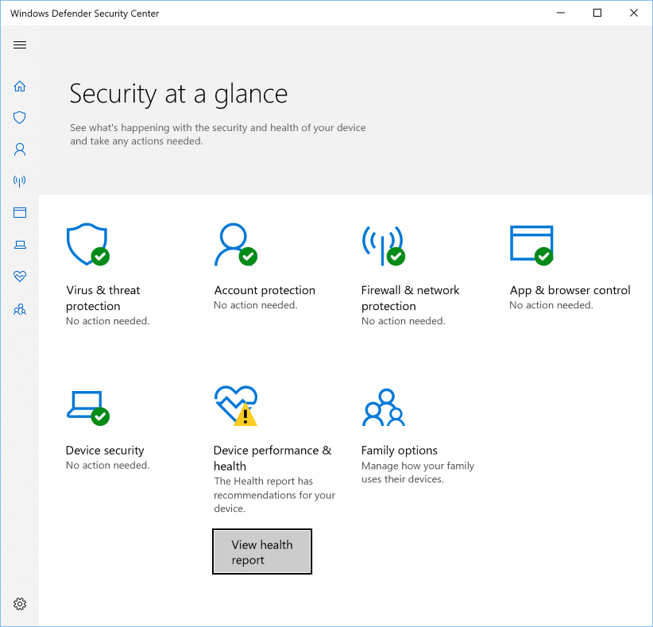
7. You can see from the screenshot that the Virus & threat protection needs no action. This indicates that everything is up to date. If you click on the Virus & threat protection icon you will see the following screenshot:

8. To check whether or not you have the latest up to date virus definitions click the Virus & threat protection updates as highlighted (6) in the above screenshot. You will then see the Protection updates screen as shown in the following screenshot:
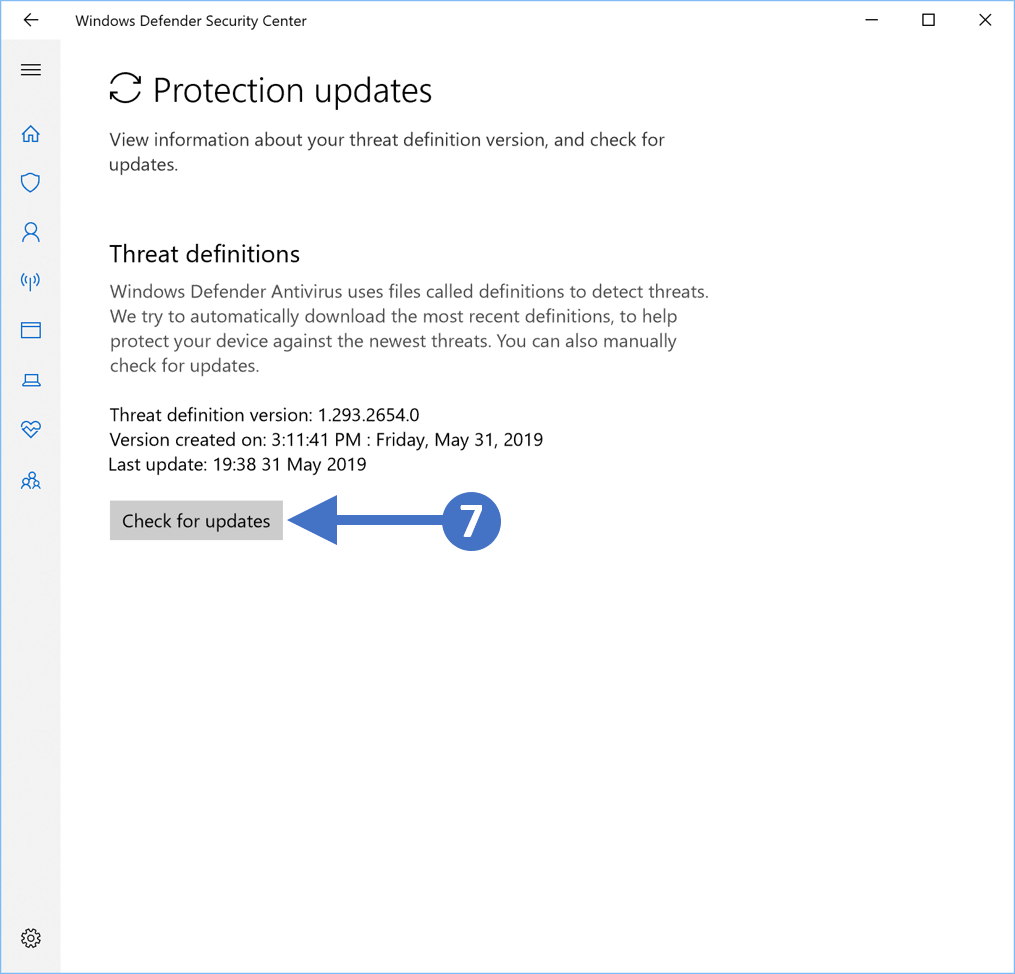
9. To check for updates click the Check for updates button as highlighted (7) in the above screenshot. Your PC will now check for any updated virus definitions files and download them. You will also be asked to restart the service.
You have now successfully checked that your antivirus is enabled and up to date using Windows Defender for Windows 10.
Configuring Windows Defender Antivirus for Windows 8.x
In this section, we are going to describe the process for enabling the Windows Defender feature on Windows 8.x. Follow the steps below to work through the process of enabling and checking Windows Defender:
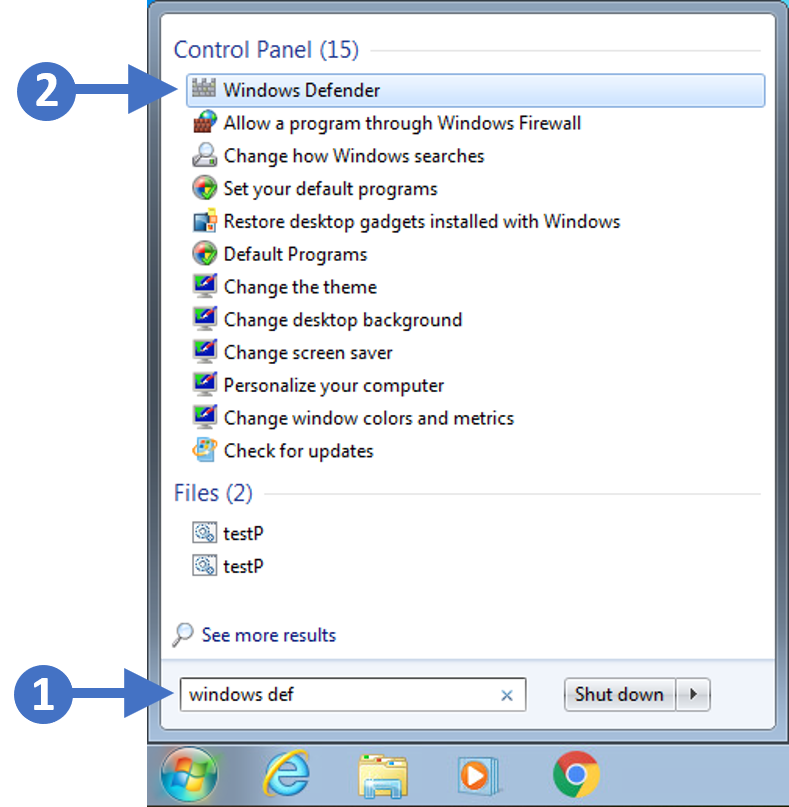
1. Press the Windows key on your keyboard and then start to type in "windows defender" in the search box highlighted (1). You will then see the Windows Defender appear in the results highlighted (2). Click on Windows Defender to launch it as shown in the following screenshot:

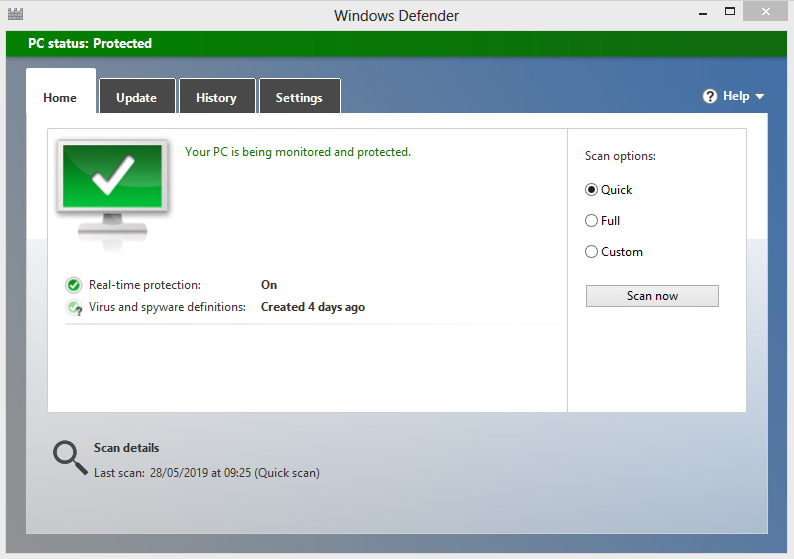
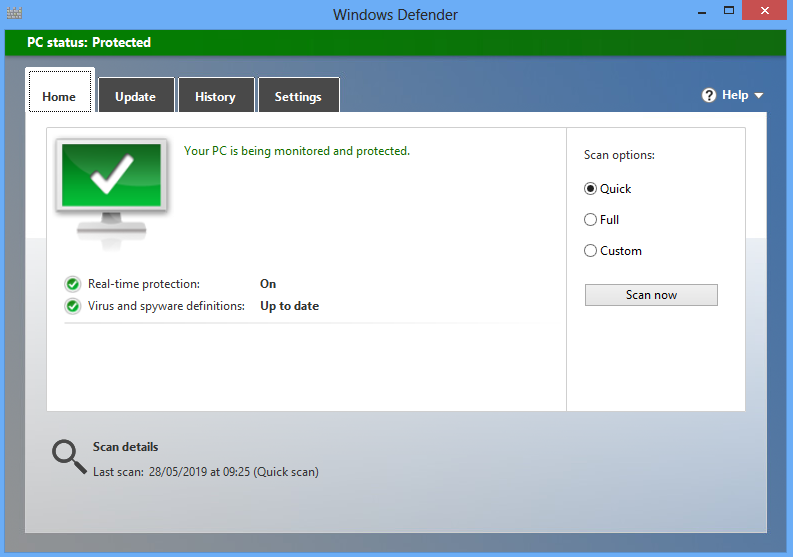
2. You will now see the Windows Defender screen as shown in the following screenshot:
3. Now click on the Update tab highlighted (3) as shown in the following screenshot: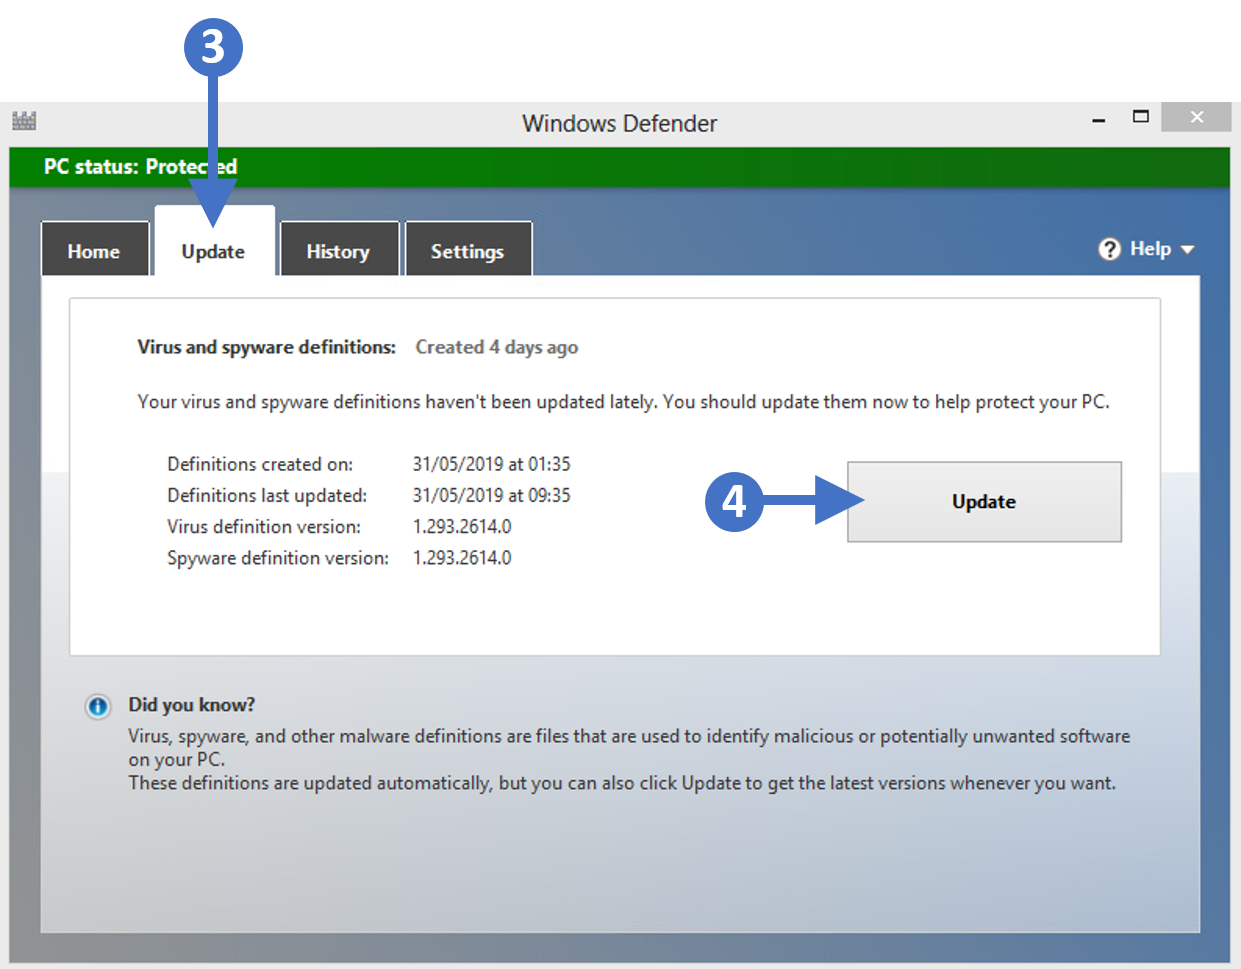
4. You will see details of when the spyware definitions were last created, along with the definition versions and the date and time that these were last updated. Now click the Update button as highlighted (4) in the previous screenshot.
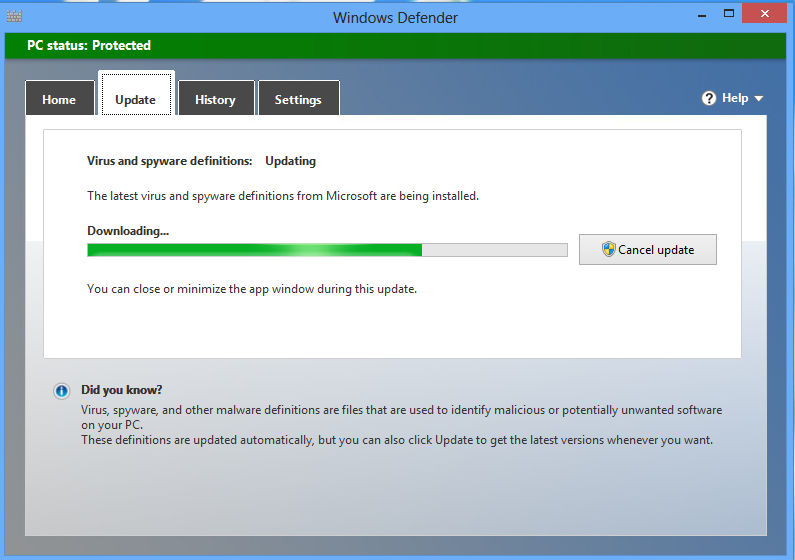
5. You will now see the latest virus and spyware definitions download and update as shown in the following screenshot:
6. Once the update has completed you will now see the following screenshot:
You have now successfully checked that your antivirus is enabled and up to date using Windows Defender for Windows 8.x.
Configuring Windows Defender Antivirus for Windows 7
In this section, we are going to describe the process for enabling the Windows Defender feature on Windows 7. Follow the steps below to work through the process of enabling and checking Windows Defender:
1. Press the Windows key on your keyboard and then start to type in "windows defender" in the search box highlighted (1). You will then see the Windows Defender appear at the top of the list highlighted (2). Click on Windows Defender to launch it as shown in the following screenshot:
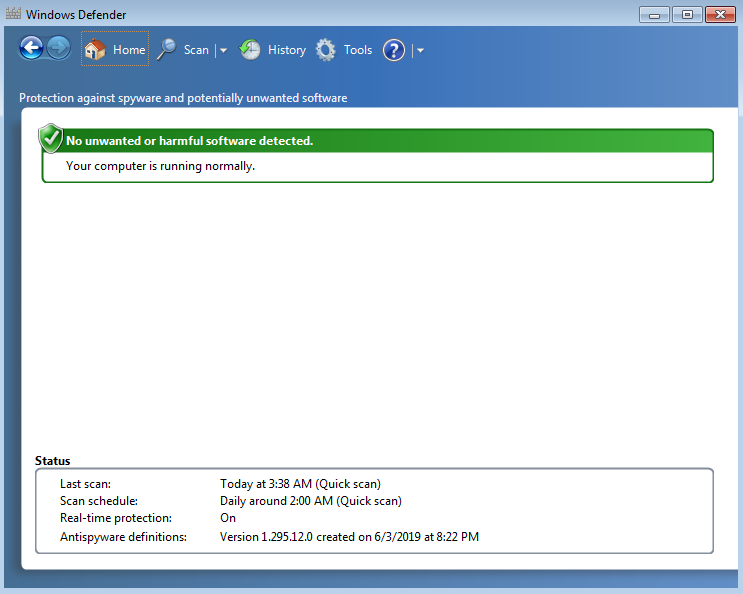
2. You will now see the Windows Defender screen as shown in the following screenshot:
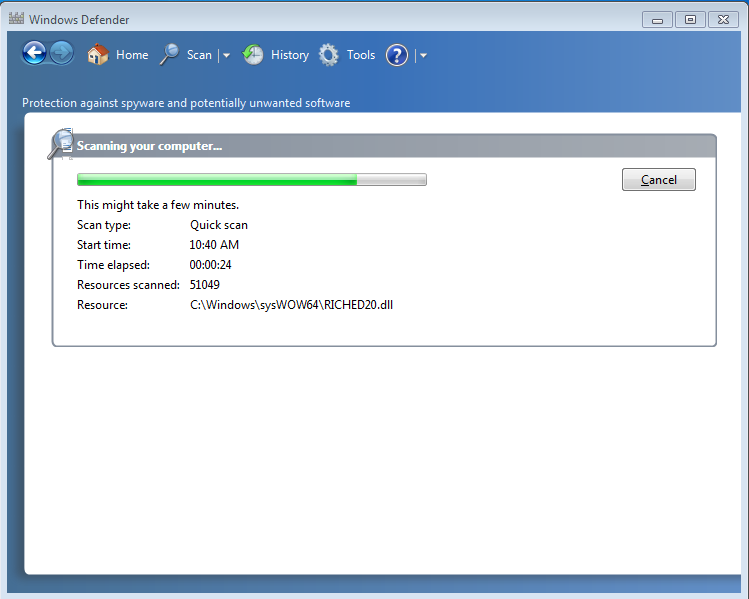
3. Now click the Scan button. You will now see the following screenshot:
4. Finally, you return to the main Windows Defender screen showing the latest scan and update details as shown in the following screenshot: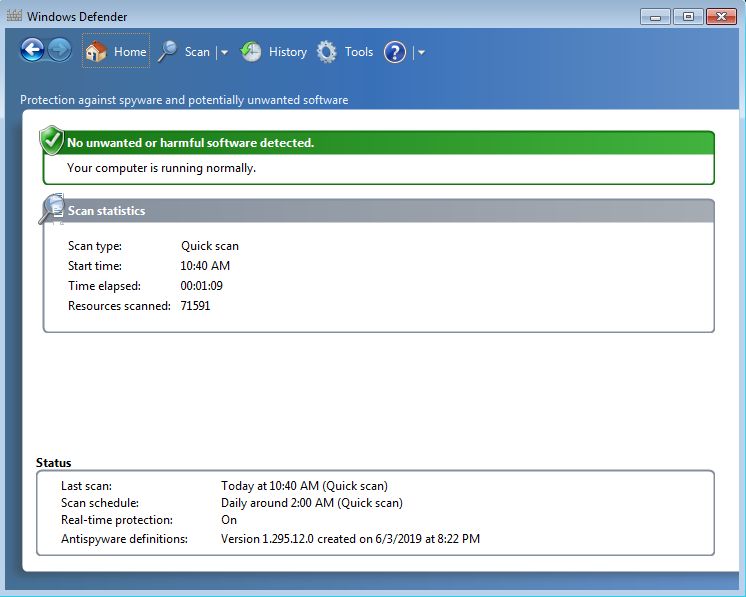
You have now successfully checked that your antivirus is enabled and up to date using Windows Defender for Windows 7.
In the next sections, we are going to look at some of the other popular antivirus solutions and how to ensure they are all up to date. We will describe the steps using a Windows 10 desktop, however, the actual antivirus software itself will look the same regardless of the operating system. It will just be the way you launch it that will differ.
AVG Free 
If you have AVG free installed on your PC or laptop, then follow the steps below to ensure that it is running the latest versions.
1. Press the Windows key on your keyboard and then start to type in "avg" in the search box highlighted (1). You will then see the AVG Antivirus FREE appear at the top of the list as the best match, highlighted (2). Click on AVG Antivirus FREE to launch it as shown in the following screenshot:

2. You will now see the AVG Antivirus Free console screen as shown in the following screenshot:
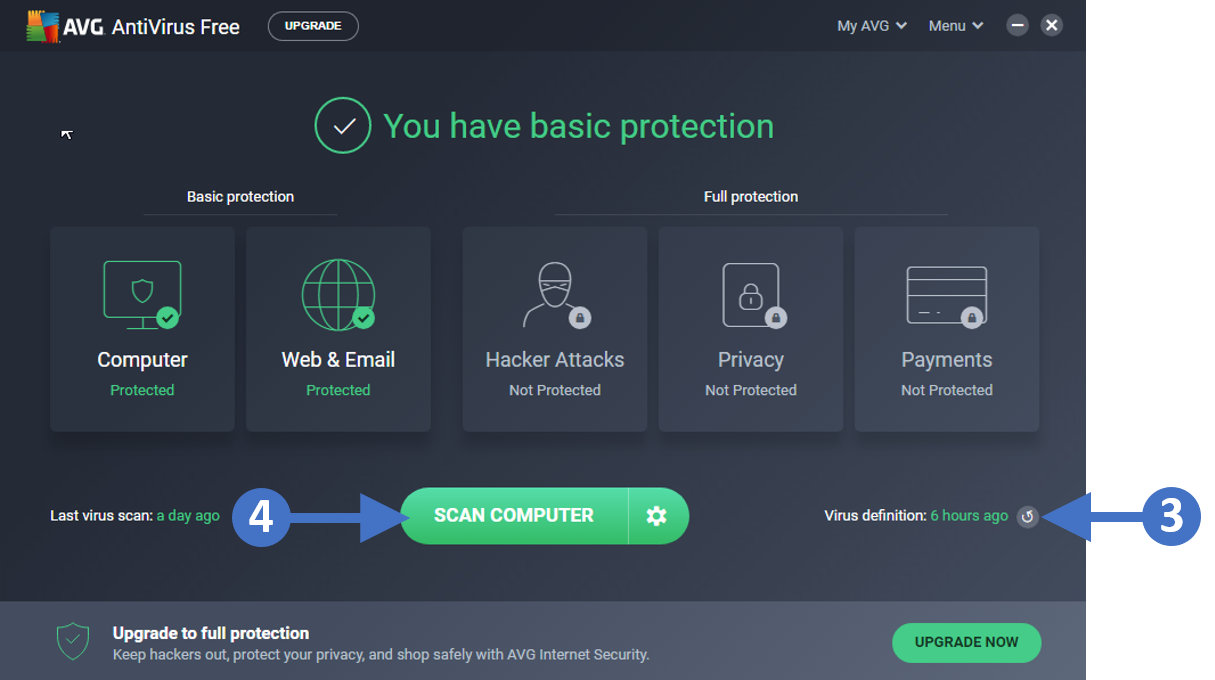
3. Click the refresh icon next to Virus definition highlighted (3) to ensure you have the latest definition files, and then click the SCAN COMPUTER button highlighted (4).
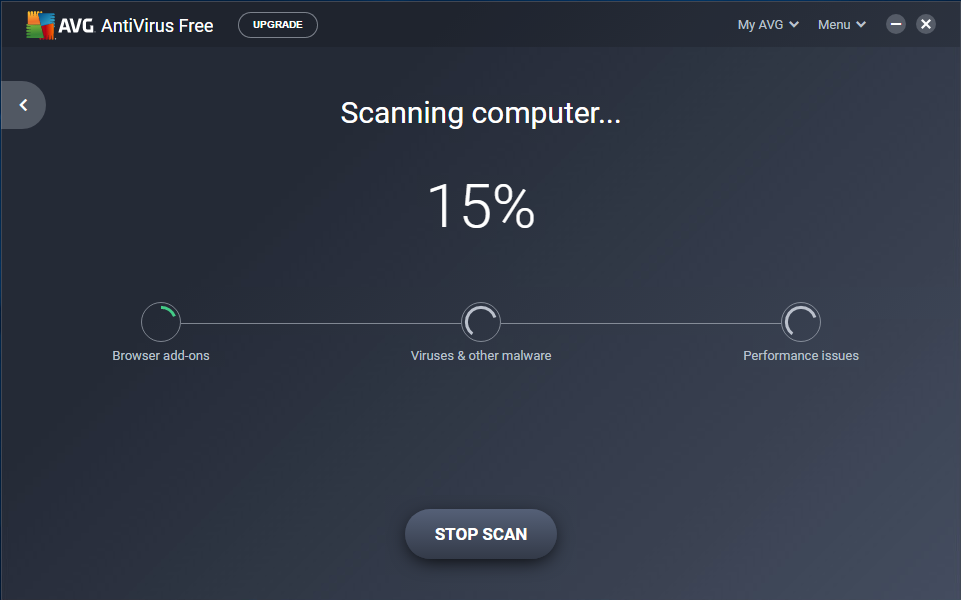
4. You will now see the scan process start, showing the current progress as shown in the following screenshot:
5. Once completed you will see the Scanning finished screen as shown in the following screenshot:
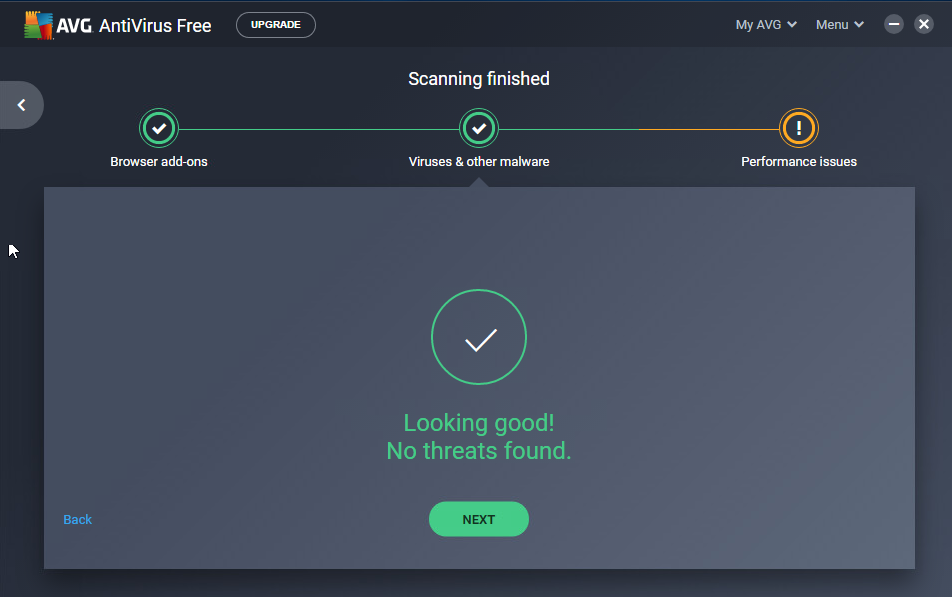
6. Now close the AVG Antivirus console screen/application.
You have now successfully checked that your AVG antivirus is enabled and up to date.
McAfee 
If you have McAfee installed on your PC or laptop, then follow the steps below to ensure that it is running the latest versions.
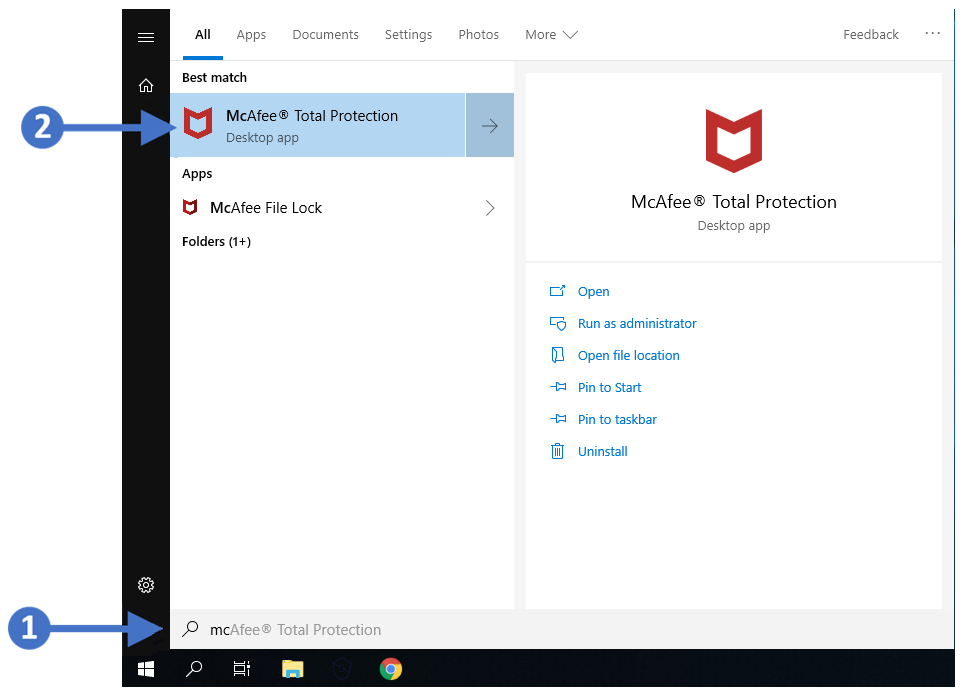
1. Press the Windows key on your keyboard and then start to type in "mc" in the search box highlighted (1). You will then see the McAfee Total Protection appear at the top of the list as the best match, highlighted (2). Click on McAfee Total Protection to launch it as shown in the following screenshot:
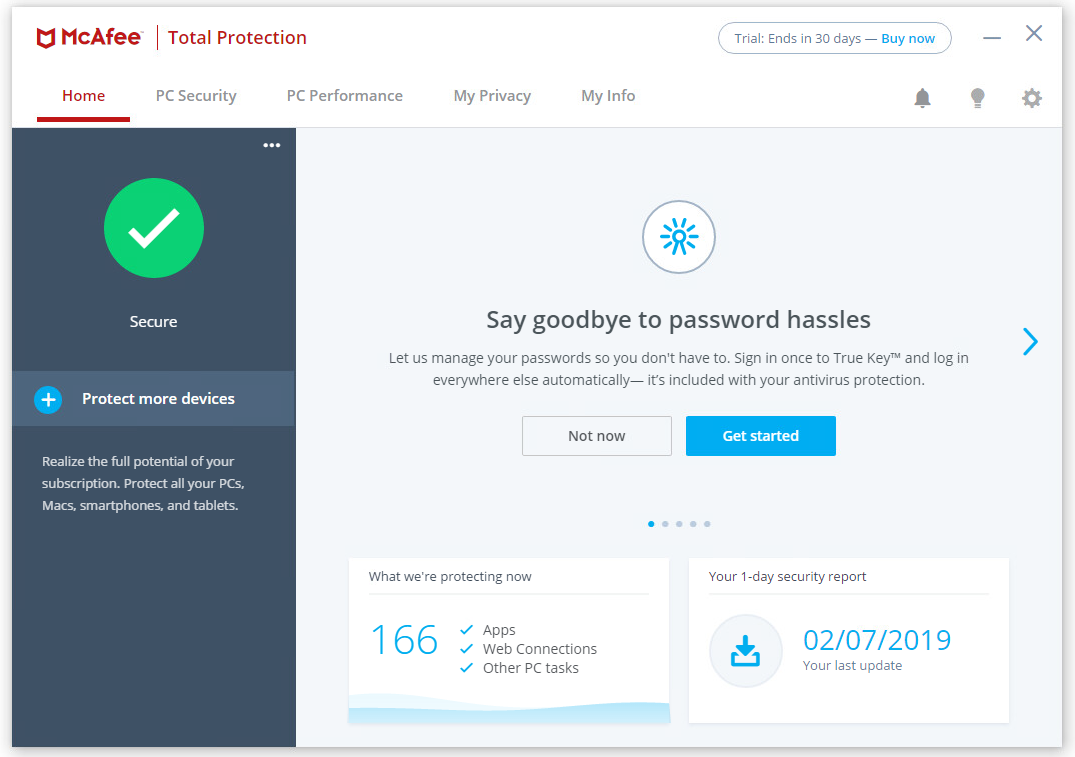
2. You will now see the McAfee console screen as shown in the following screenshot:
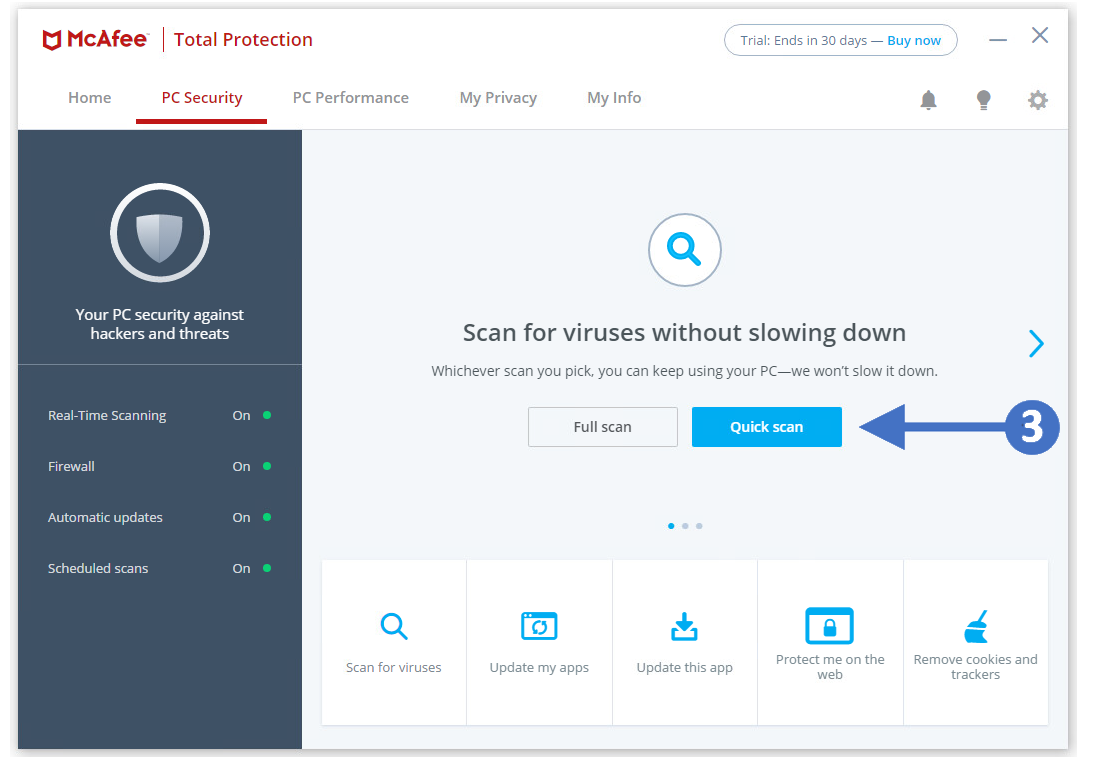
3. Click PC Security and chose between Full Scan or Quick Scan (3) to start scanning your PC.
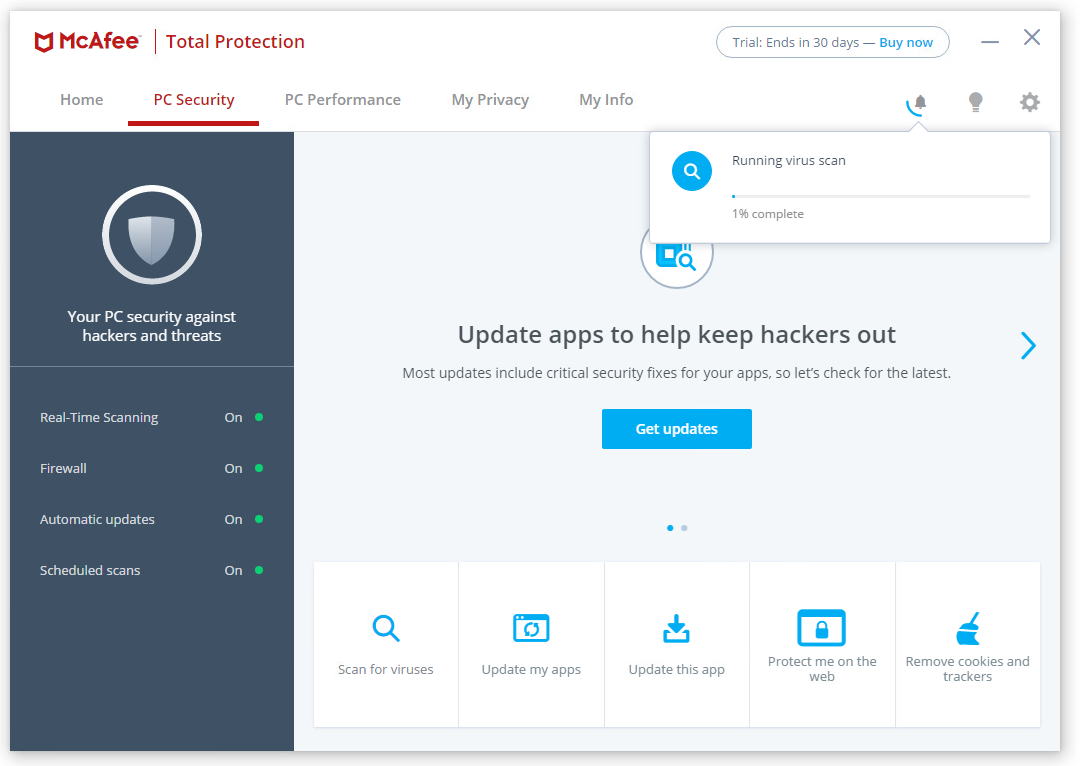
4. You will now see the scan process start, showing the current progress as shown in the following screenshot:
5. Once completed you will see the Scanning finished screen as shown in the following screenshot:
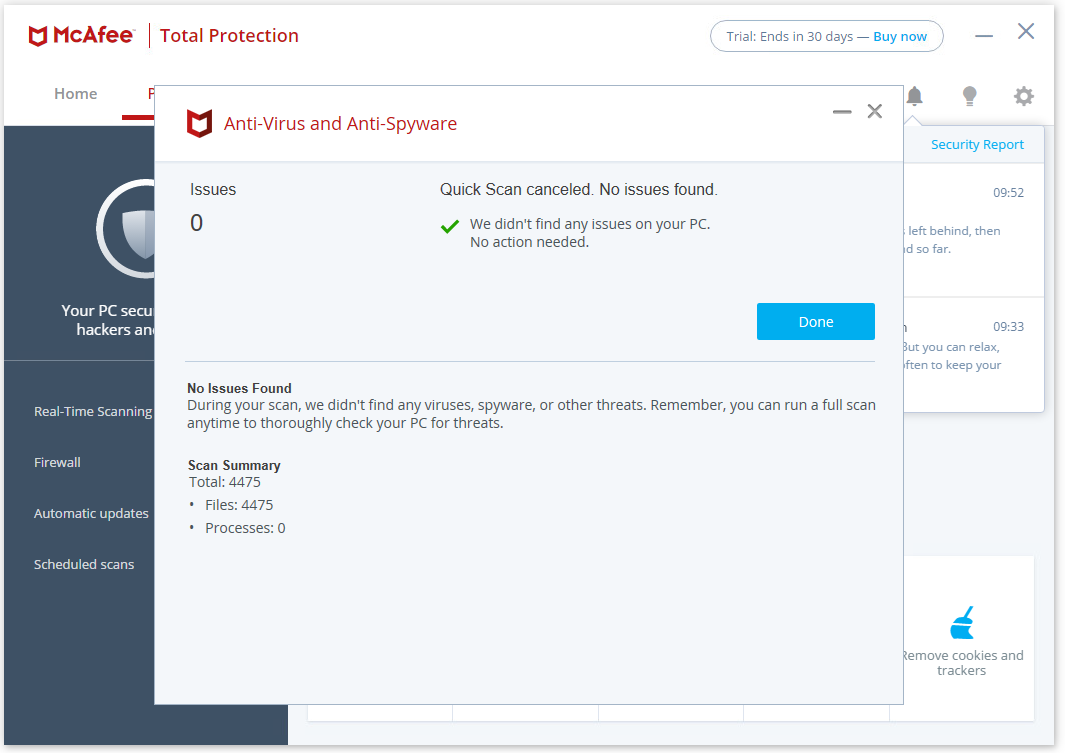
6. Now close the McAfee Antivirus console screen/application.
You have now successfully checked that your McAfee antivirus is enabled and up to date.
Norton 
If you have Norton installed on your PC or laptop, then follow the steps below to ensure that it is running the latest versions.
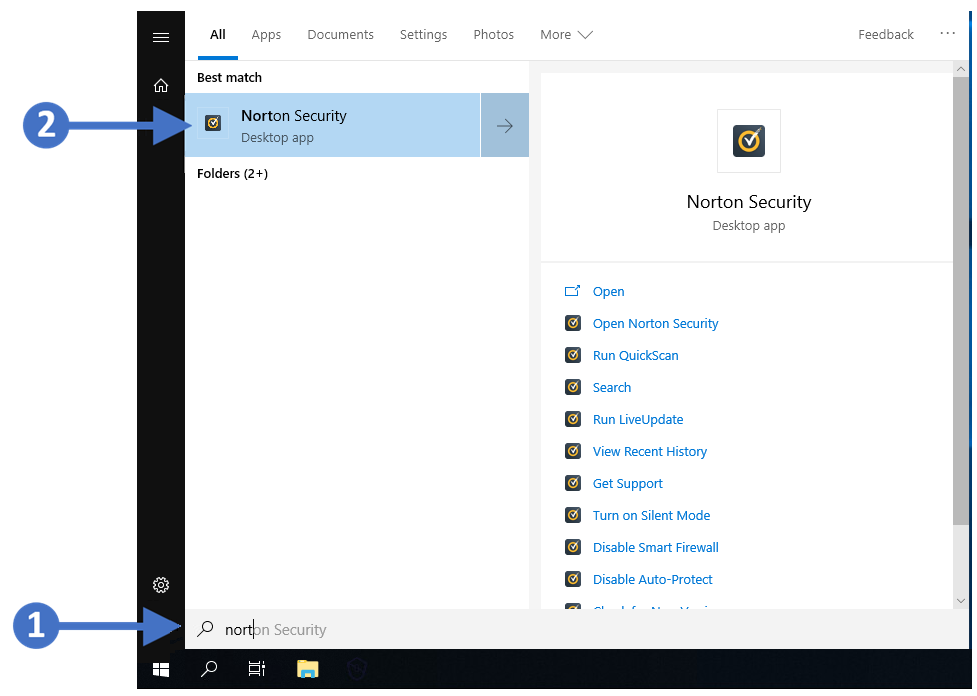
1. Press the Windows key on your keyboard and then start to type in "Norton" in the search box highlighted (1). You will then see the Norton Security appear at the top of the list as the best match, highlighted (2). Click on Norton Security to launch it as shown in the following screenshot:
2. You will now see the Norton Security console screen as shown in the following screenshot:
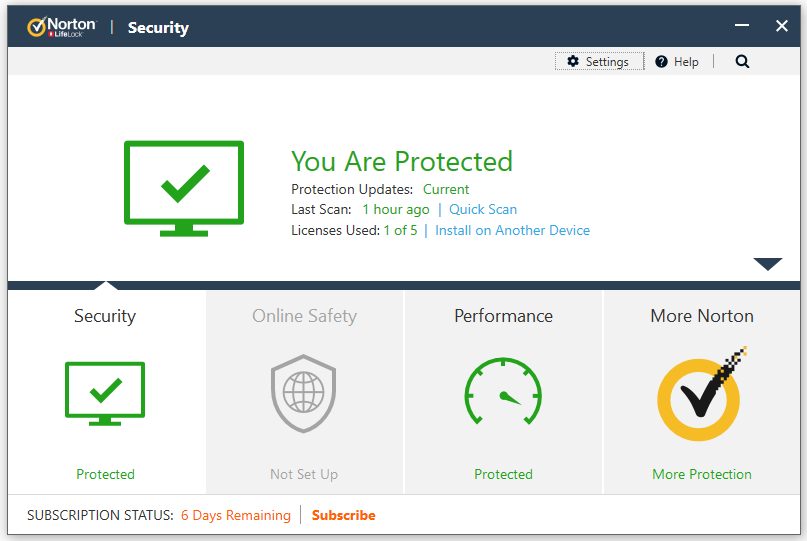
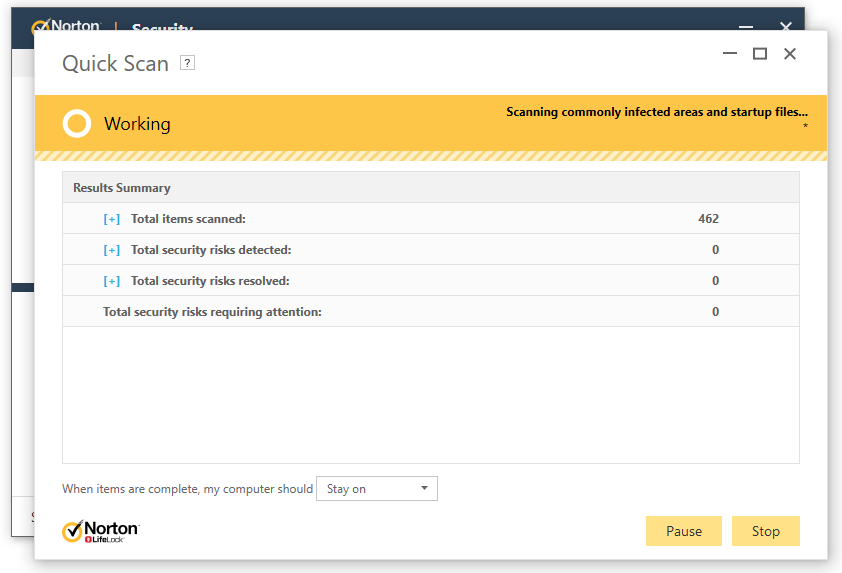
3. Click Quick Scan (3) to start scanning your PC.
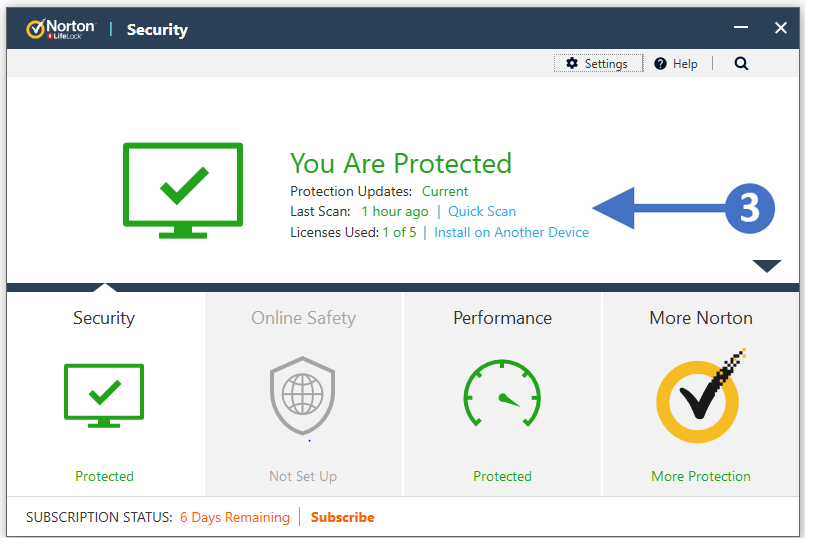
4. You will now see the scan process start, showing the current progress as shown in the following screenshot:
5. Once completed you will see the Scanning finished screen as shown in the following screenshot:
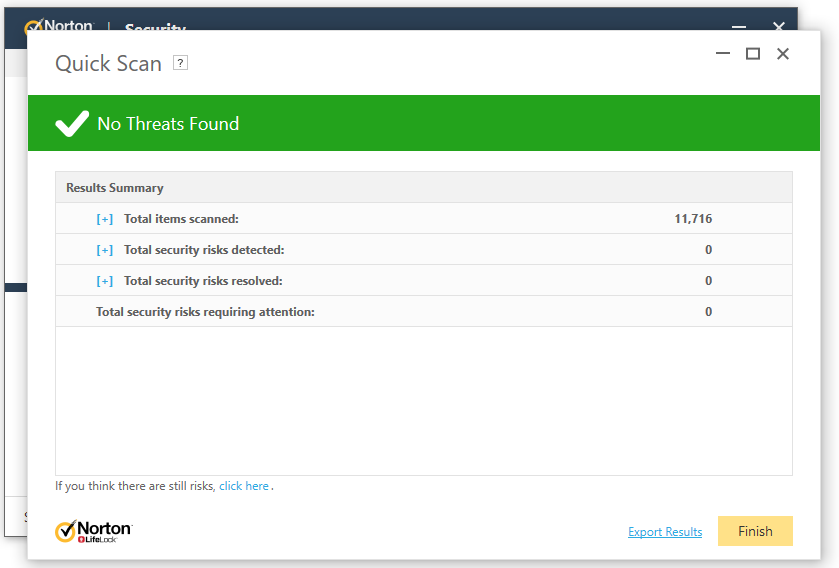
6. Now close the Norton Antivirus console screen/application.
You have now successfully checked that your Norton antivirus is enabled and up to date.
Avast 
If you have Avast Free Antivirus installed on your PC or laptop, then follow the steps below to ensure that it is running the latest versions.
1. Press the Windows key on your keyboard and then start to type in "avast" in the search box highlighted (1). You will then see the Avast Free Antivirus appear at the top of the list as the best match, highlighted (2). Click on Avast Free Antivirus to launch it as shown in the following screenshot:

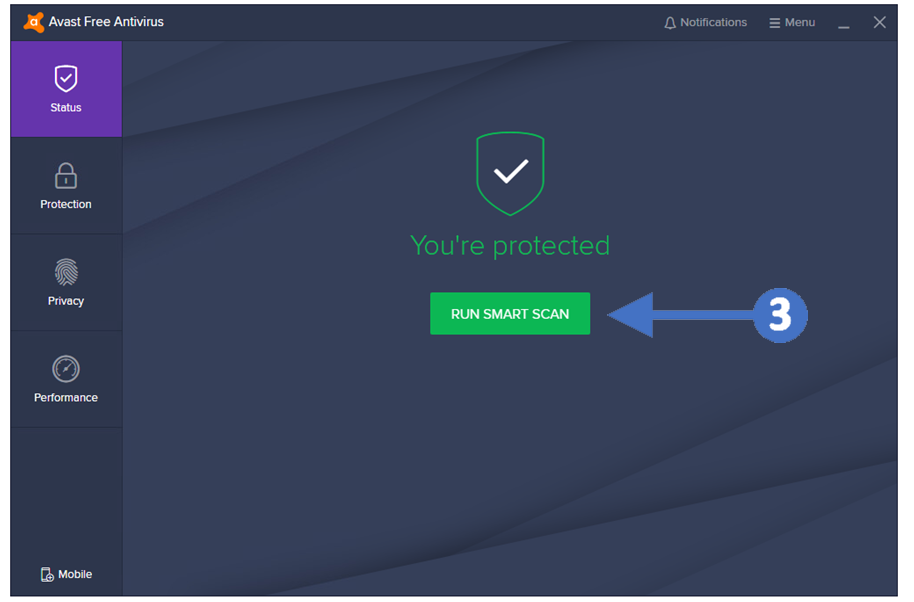
2. You will now see the Avast Free Antivirus console screen as shown in the following screenshot:

3. Click Run Smart Scan (3) to start scanning your PC.
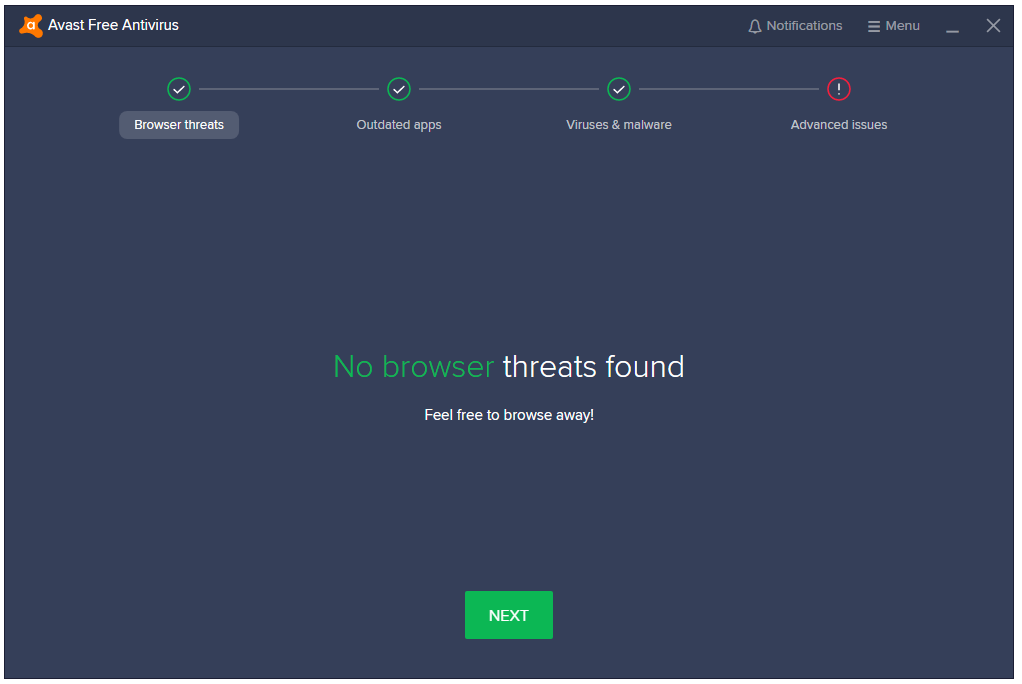
4. You will now see the scan process start, showing the current progress as shown in the following screenshot:
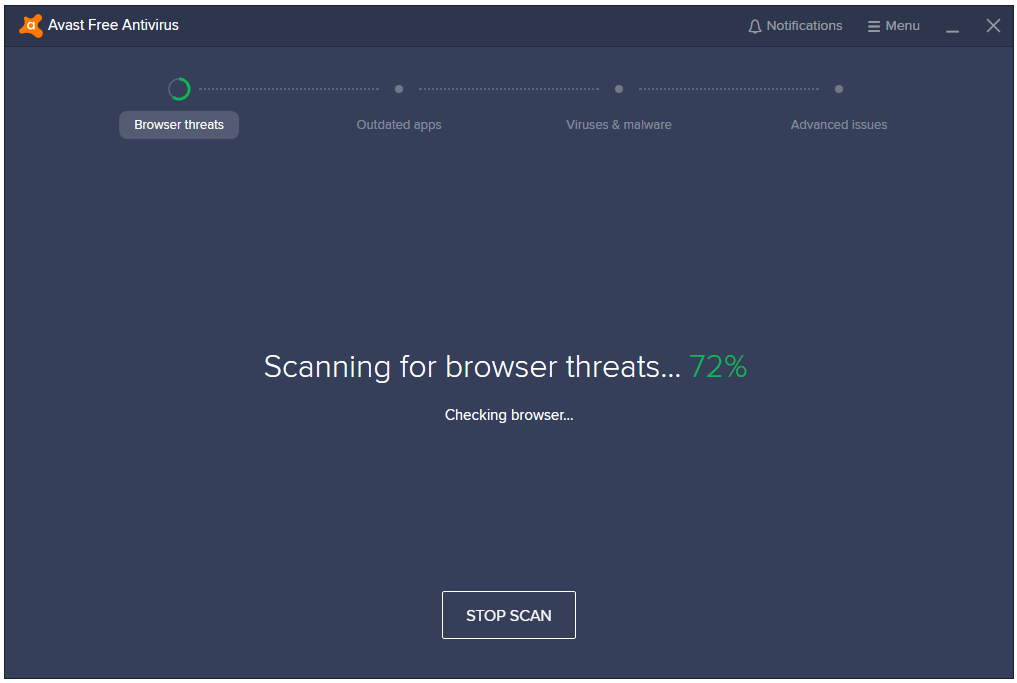
5. Once completed you will see the Scanning finished screen as shown in the following screenshot:
6. Now close the Avast Antivirus console screen/application.
You have now successfully checked that your Avast antivirus is enabled and up to date.