
1. TDA license key installation and assignment
2. TDA Device Policy creation and assignment
3. Basic profile configuration and assignment
4. Access key creation and TDA installation options
1. TDA LICENSE KEY INSTALLATION AND ASSIGNMENT
The first step is to obtain the TDA license from your account manager if you already don't have one. It will be delivered via email, in .lic format, which we then need to import:
- Right-click on Licenses in the console tree --> Install TDA License.
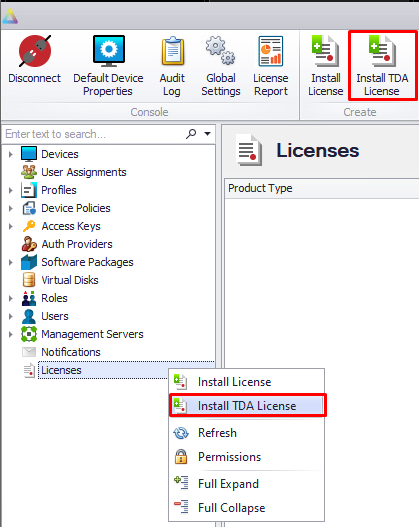
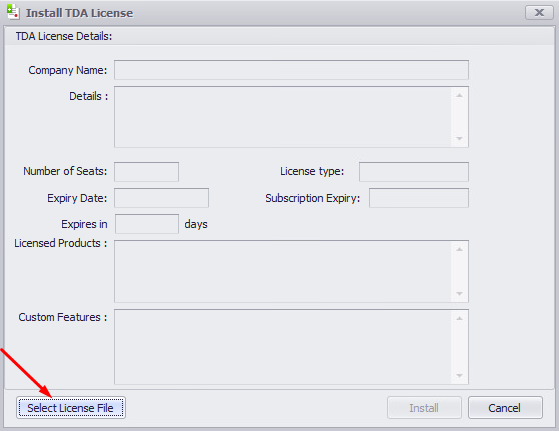
- The following window will open, and you will select the .lic file from the saved location.
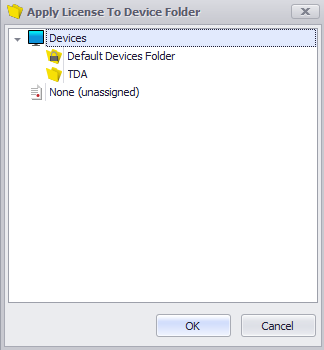
- Once added, right-click on the newly added license --> Assign License To Device Folder. Although it can be assigned to an individual Device Folder, assigning it to the root folder (Devices) is highly recommended.
2. TDA DEVICE POLICY CREATION AND ASSIGNMENT
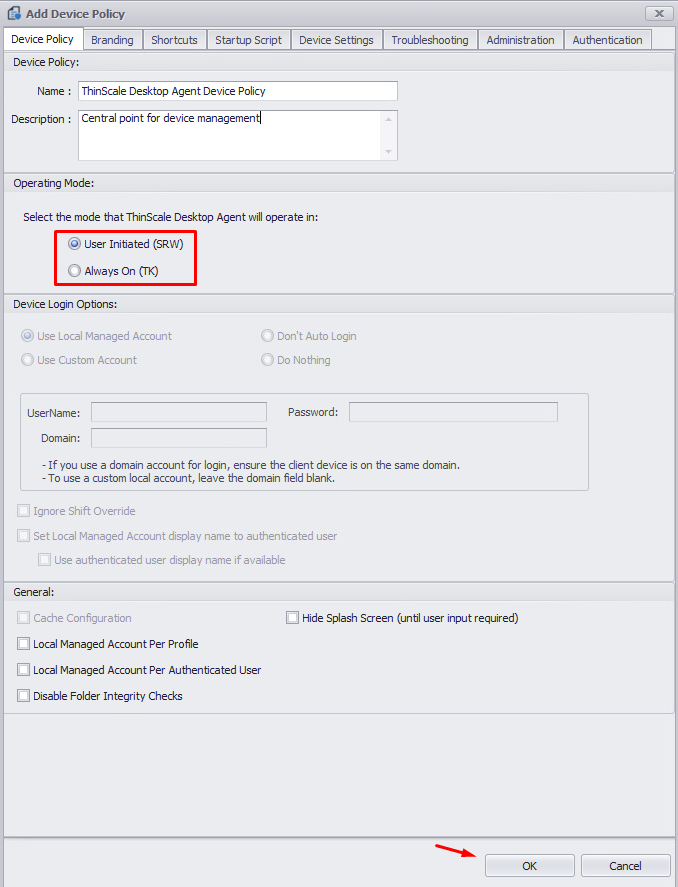
The next important step is to create the TDA Device Policy, which controls whether your ThinScale Desktop Agent operates in Secure Remote Worker mode (BYOD) or in ThinKiosk mode (for corporate-owned devices).
For this guide, we will only focus on the Device Policy tab; a detailed explanation of every function available can be found HERE.
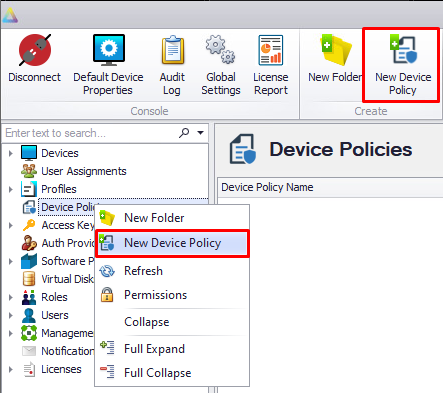
- Right-click on Device Policies, and select “New Device Policy” (top ribbon button can also be used)
- Select the desired operating mode, adjust the other settings as needed, and click “OK.”
- Now that we have the Device Policy ready in the desired mode, we need to assign it to the device folder in which our new TDA devices will reside. It can be done on a global level or per folder.
To apply the newly created Device Policy, please open “Default Device Properties” and navigate to the "TDA Settings" tab to select.
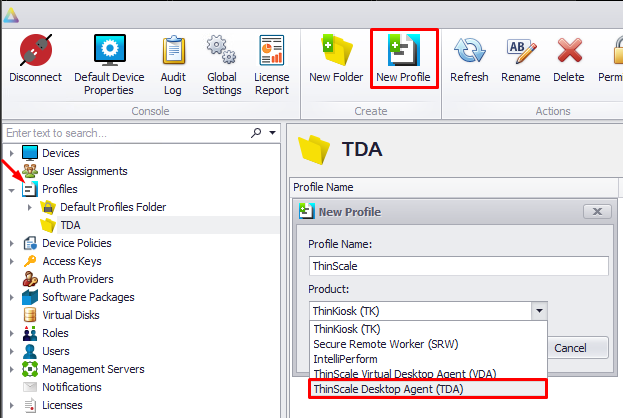
3. BASIC PROFILE CREATION AND ASSIGNMENT
The main changes in the profile are focused on Process Security (former AEP), Secure Browser, and other extras in the profile structure that are described in GREAT DETAIL HERE. To create a new one, right-click on profiles (or use the ribbon button) and select as shown below:
Once you're happy with the profile, let's create a folder to assign it to by right-clicking on “Devices” --> New Folder, or use the ribbon options:
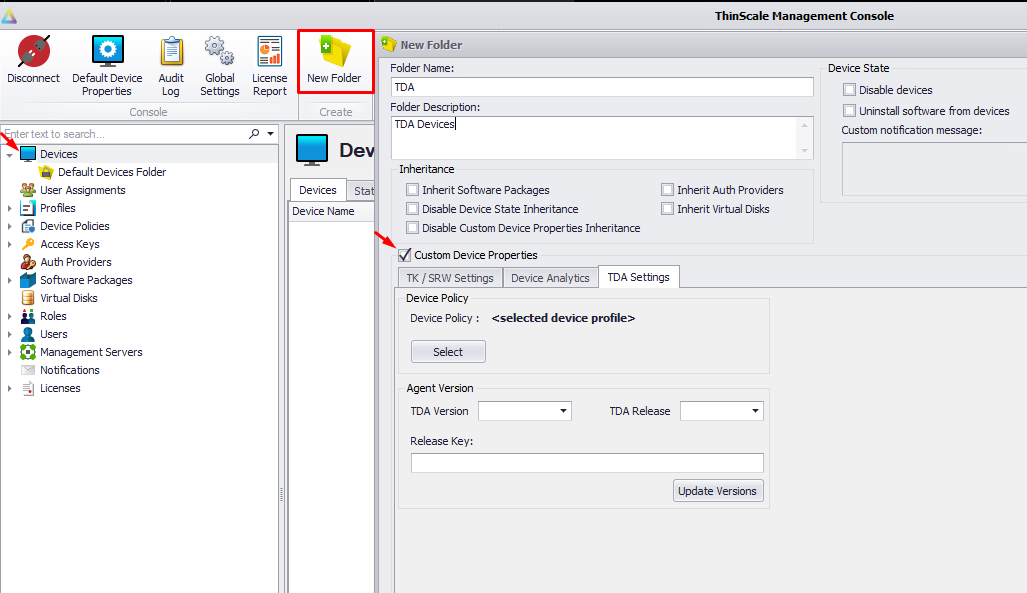
* If "Custom Device Properties" is ticked, Global Settings from Step 2 will not apply, and the TDA Device Policy needs to be added here.
IMPORTANT!
If Dual Persona or Temporary Storage is being used in the profile, Windows Home Editions will require Virtual Disk to be assigned more information can be found HERE.
4. ACCESS KEY CREATION AND TDA INSTALLATION OPTIONS
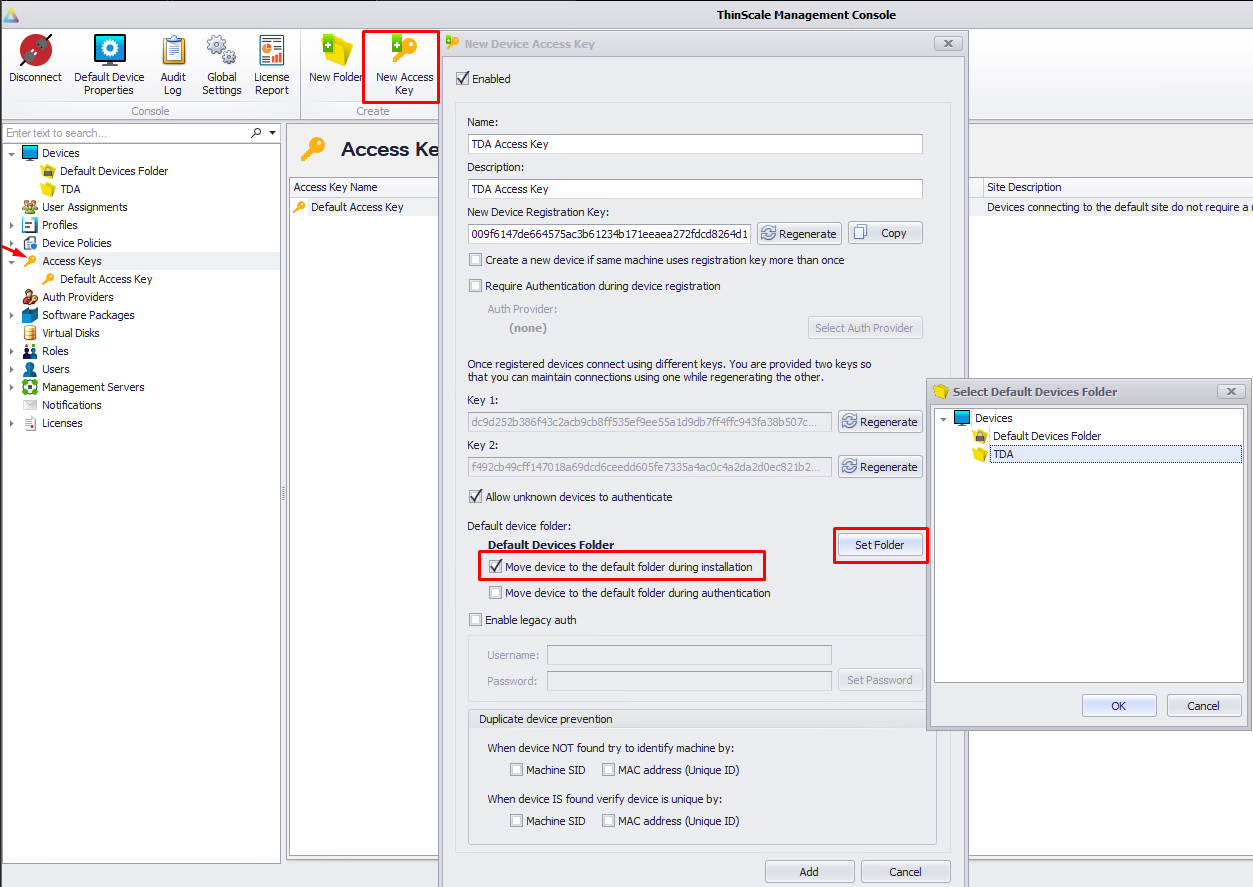
With the environment ready, we need a Device Registration Key placed in the desired folder during installation/registration. Default Access Key can also be used, but it is recommended to create additional ones for greater control and a cleaner view. Multiple deployment methods are available to suit your needs; more information is available in the ThinScale Desktop Agent Installation article.
- Right-click on Access Keys, select “New Access key” (or use the ribbon)
- Give it a name and description
- Tick the options below, and set the folder where devices will land upon registration.
Success! Your environment is ready for ThinScale Desktop Agent Installation or Upgrade from SRW/TK.