
Application Execution Prevention, or called Process Identity on v8, is one of the most important functions in the profile and a critical component of the ThinScale security features set. Therefore, implementing it properly can play a key role in your organisation, and ignoring it could have significant impacts. We strongly recommend and advise you to get familiar with it, and the guide below is here to assist you with the initial setup and best practices for the most commonly used applications.
AEP is a system-level function that can prevent any application from running based on a set of custom defined rules, which can get very complex using AND/OR operators.
If not set up correctly, it can prevent the system from operating as expected, until the active SRW/ThinKiosk profile is rectified and reloaded, not to mention the vulnerabilities you are leaving yourself exposed by having AEP disabled.
By default, SRW/ThinKiosk applications will be allowed once verified by signed security certificates, file description, file hash and other methods, which combined together give a very high level of protection against running any other apps than the ones you have defined as per below examples
Here are examples of how to set up a Microsoft Teams Windows App. The apps downloaded from https://my.thinscale.com/ have a Readme inside the zip file with the rules that need to be created.
There are different options you can use to allow/ disallow certain applications to run within your SRW/ThinKiosk session, here follow some examples.
The first step is to enable “Block the executable if it does not match any of the configured rules below”
This is the list that ThinScale advices to have enabled by Default to guarantee Windows operability
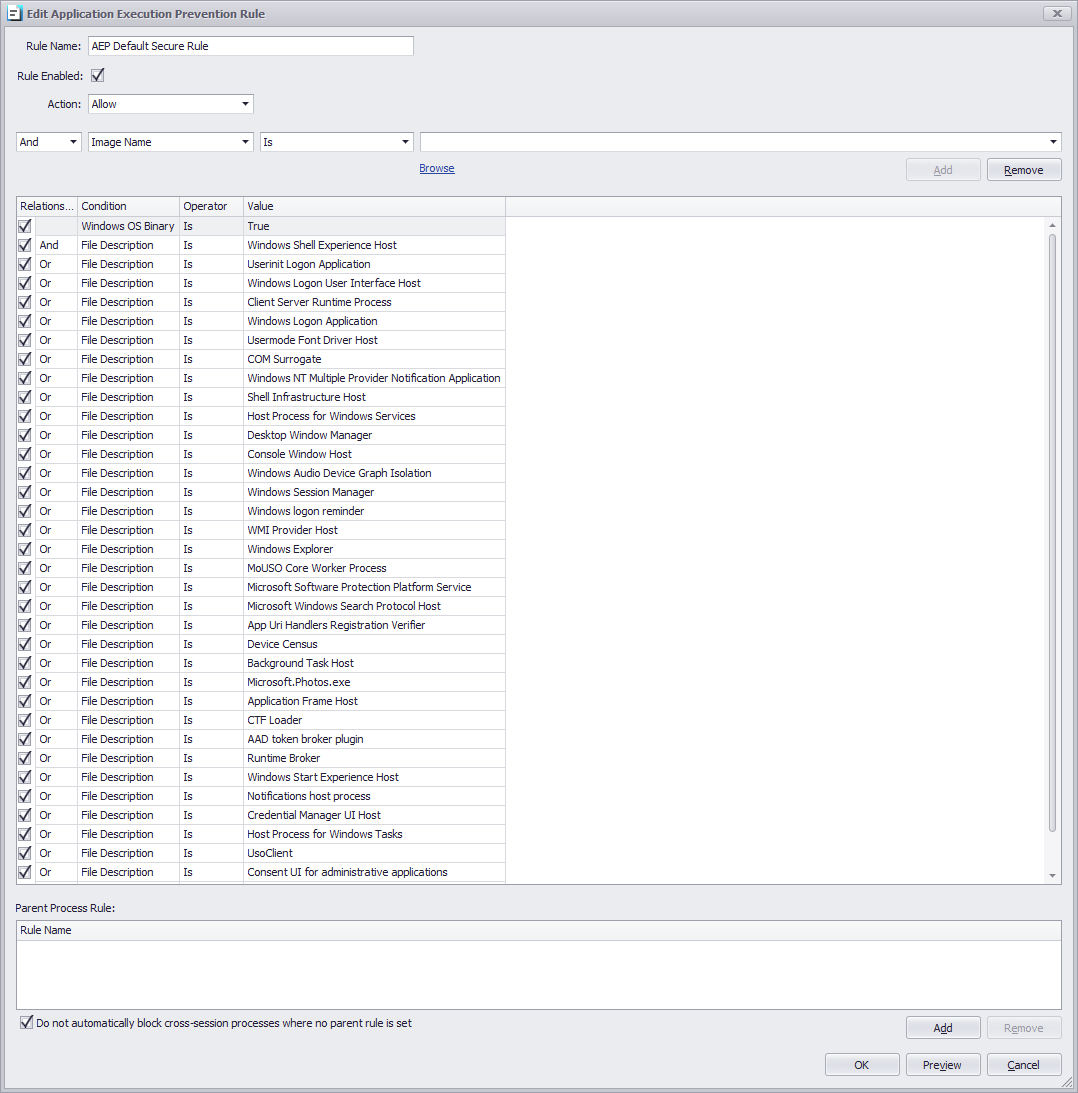
This rule will only allow execution for Windows OS binary applications and the files that match that File Description.
Alternatively, you can add an extra set of rules, using, a certificate thumbprint, considered more secure.
Example of Vmware Horizon client
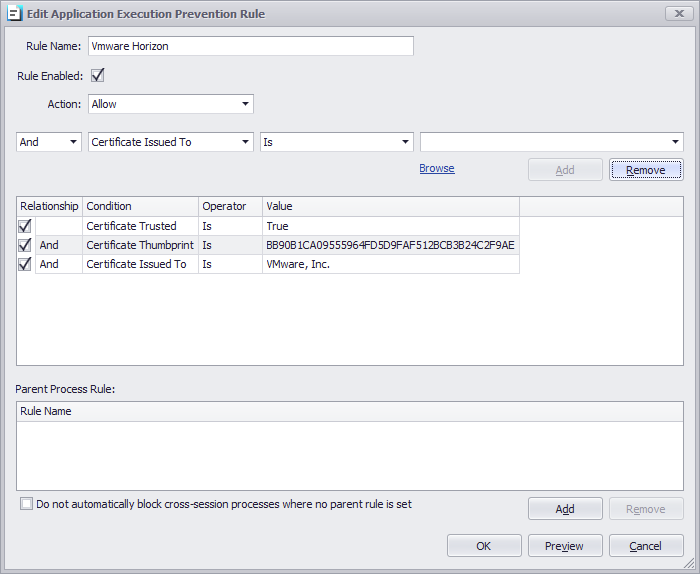
Note: a certificate thumbprint value could be different from the one shown above.
To simply retrieve the certificate thumbprint, press the browse button and click the executable you want to include. The certificate thumbprint value will be automatically retrieved for you and the form will be populated. Click Add and OK.
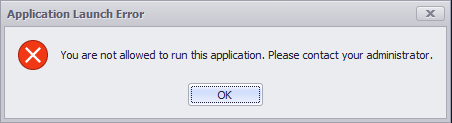
The list of rules above will only allow VMware Client and some Windows binary, the others will be blocked and a message will be displayed.
Additionally, when creating a rule, there are relationships and conditions you can use to match or not a specific file name, size of the file, last modified date and time, Windows OS binary and all the other options in the profile editor.
The rule that denies the locally installed MS Paint application, from executing would show the user accessing that application will this dialog message:
Application Execution Prevention Processing Example
Application execution prevention rule processing is sequenced by the relationship between each condition in the rule and the preceding condition. For ‘and’ conditions the conditional test must all pass. For ‘or’ conditions they are examined as a “one of many” situation. The 1st condition in the rule will ignore the ‘relationship’ field as there are no preceding conditions. In the following example, we show a rule to allow only 2 very specific versions of “Calculator” given the cert thumbprint and sizes.
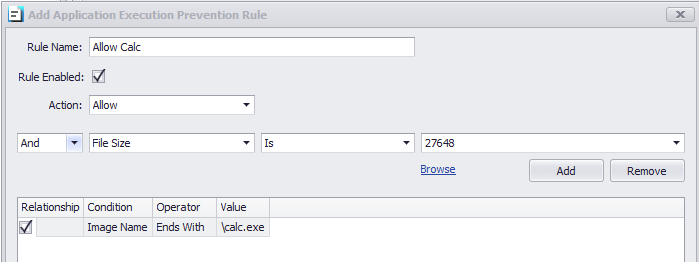
First, we want to ensure the correct path, so we add a condition to verify the filename. “Image Name” represents the full path and filename and the only condition where the upper/lower case does not matter.
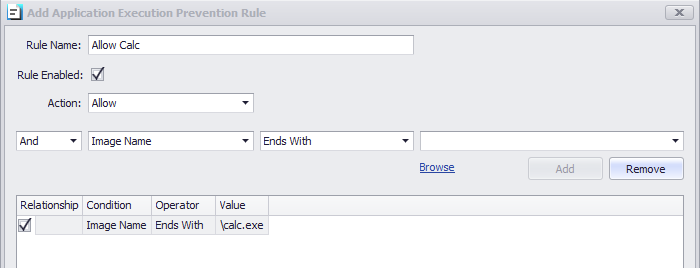
Secondly, we want to allow 2 possible file sizes. To do this we add another condition to test the file size as shown below. The value to check was obtained using the “Browse” action and selecting the required binary – the editor will automatically select the appropriate value and populate the field.
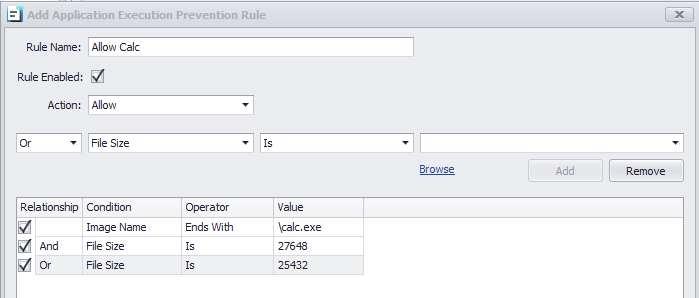
Finally, we need to add a second size to allow. The difference is we must select a relationship of ‘or’ to indicate “the 1st size or the 2nd size”. In the image below, we see all 3 conditions added. This can be read as “(image name) AND (1st size OR 2nd size)”.
For more profile options and best practices please follow this article and download either the SRW or the TK profile.