User Assignments
User Assignments configuration. #MC-KB20

Written by
Last published at: February 28th, 2024User Assignments, introduced with 7.2.41 version, provide administrators more flexibility and control over assigning profiles and software packages to specific users by utilizing the group ID/s of the Authentication Providers, thus eliminating the need to move people and devices within the console folders manually.
Example
A user who is a part of “Sales ID” will receive a profile A and software package B, while a user who is part of “Marketing ID” will receive a profile C and a software package D.
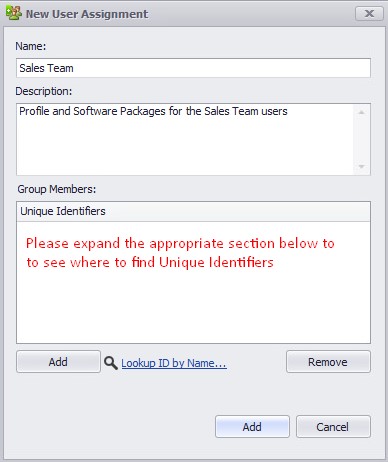
Creating a new User Assignment takes only a few clicks, with the main difference being Unique Identifier, depending on the Auth Provider used.
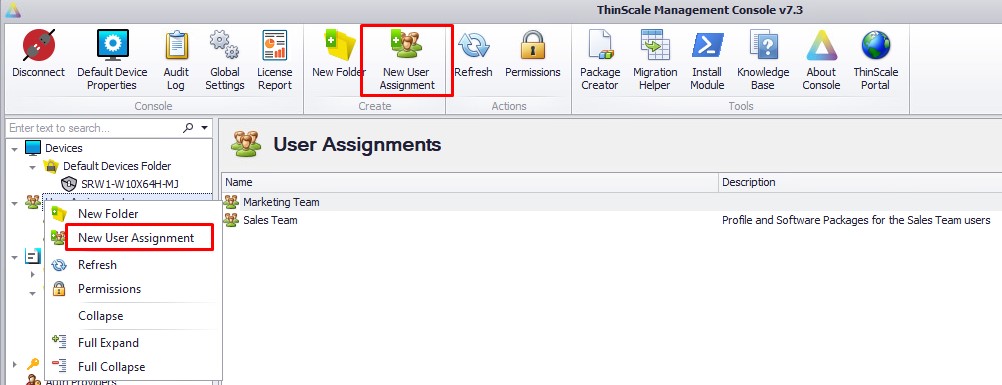
To start, right-click on User Assignments within the console, and select "New User Assignment".
Give it a desired name, add a description if needed, and add your Unique Identifier respective to your Auth Provider
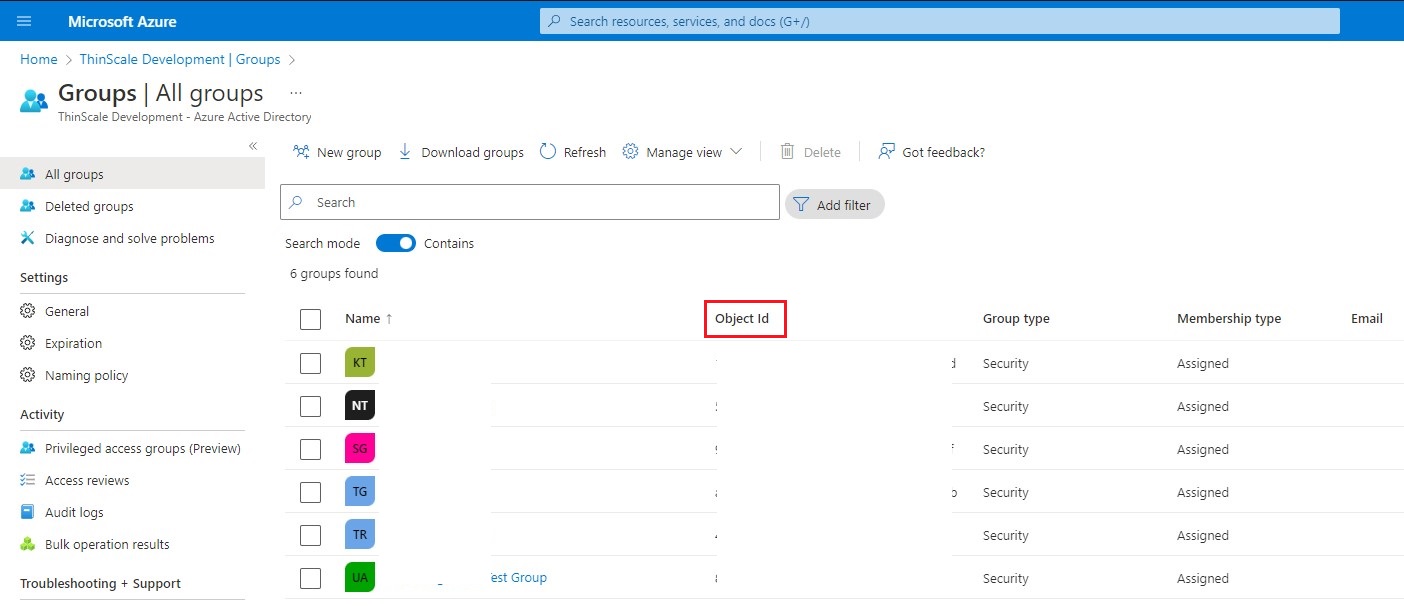
If you're using Azure Auth Provider
You need to make sure to set up the section Force Server-Side Validation from the Azure Authentication Provider configuration and add the Object ID on the field "user must be a member of at least one of the following groups) as well as the User Assignment Group members. The unique identifier will be the groups' Object ID in your Azure Active Directory:
If you're using Okta Auth Provider
The unique identifier will be Okta's target.id, which is displayed in the groups' logs or as the last part of the URL once you navigate to the groups' list: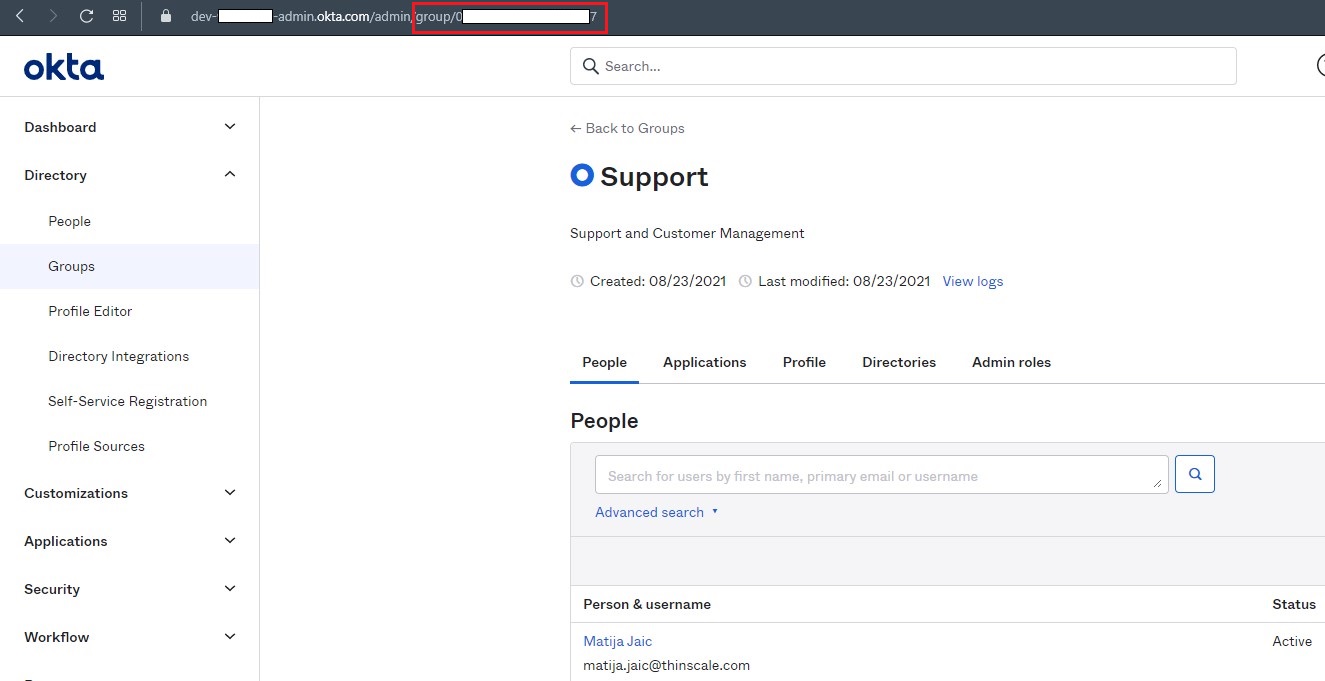
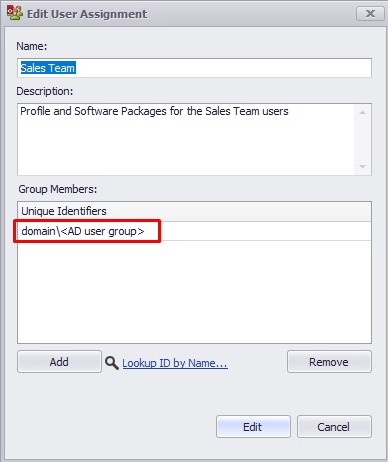
If you're using Windows Authentication Provider/LDAP
The unique identifier will be the group name in your local Active Directory, and needs to be inserted in the following format:
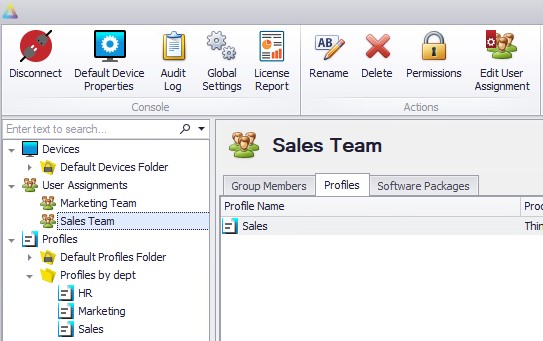
Once you are happy with your Group Members set up, all that's left to do is to assign the appropriate Profile and Software Packages: