ThinKiosk or TDA-ThinKiosk mode deployed with a master image
This article will outline the steps needed before a master image is created. #TK-KB7

Written by
Last published at: July 5th, 2024Deploying ThinKiosk, v5.x, 6.x, or 7.x
In ThinKiosk versions 5.x, 6.x, and 7.x, devices are identified in the Management Console using a unique device ID and not just the computer name.
The DeviceId is stored in the registry on each ThinKiosk machine. If you would like to use a master image to deploy ThinKiosk you will need to remove this registry entry before you capture the master image. Then when your image is deployed the device will add itself to the Management Console on first boot and a new Device Id will be created and stored in the registry.
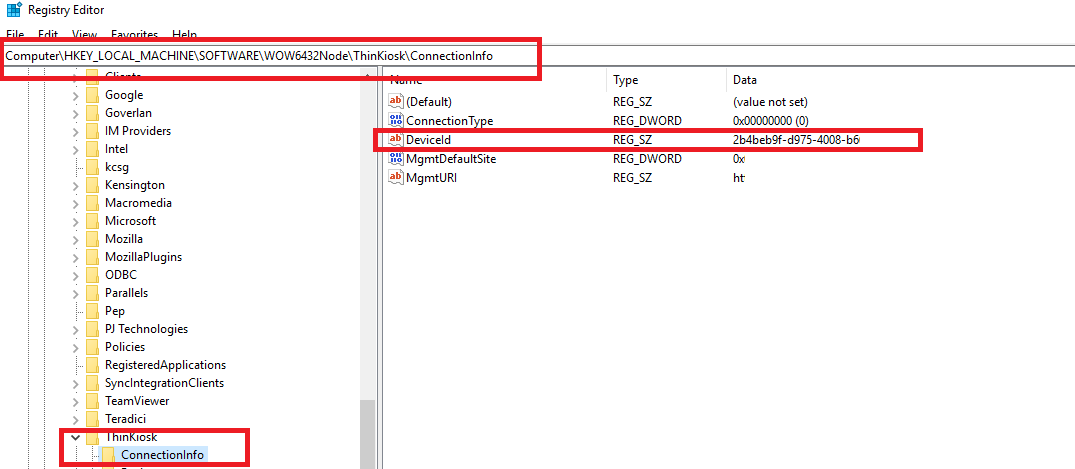
The Device ID is located here
HKLM\Software\ThinKiosk\ConnectionInfo or
HKLM\Software\WOW6432Node\ThinKiosk\ConnectionInfo
Delete the value DeviceID
Deploying TDA for ThinKiosk mode
After installing TDA on a machine which you intend to use as a master or "golden" image to deploy to other machines, you'll need to remove the machine's unique Device ID so that it picks up a new Device ID upon registration. Devices are identified in the Management Console using a unique device ID and not just the computer name.
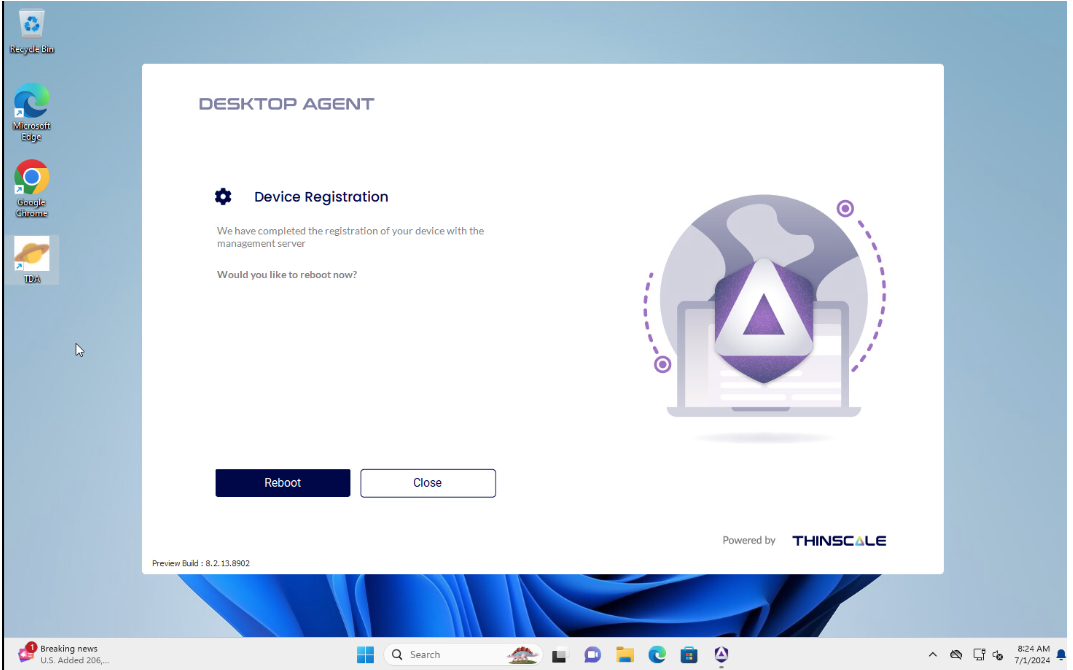
1. First please run your TDA single-click installer so that the device will appear in the portal but won't fully register yet until the first run which occurs on reboot. At this phase of the install when it's prompting for reboot, leave this on the screen and open the Registry Editor.
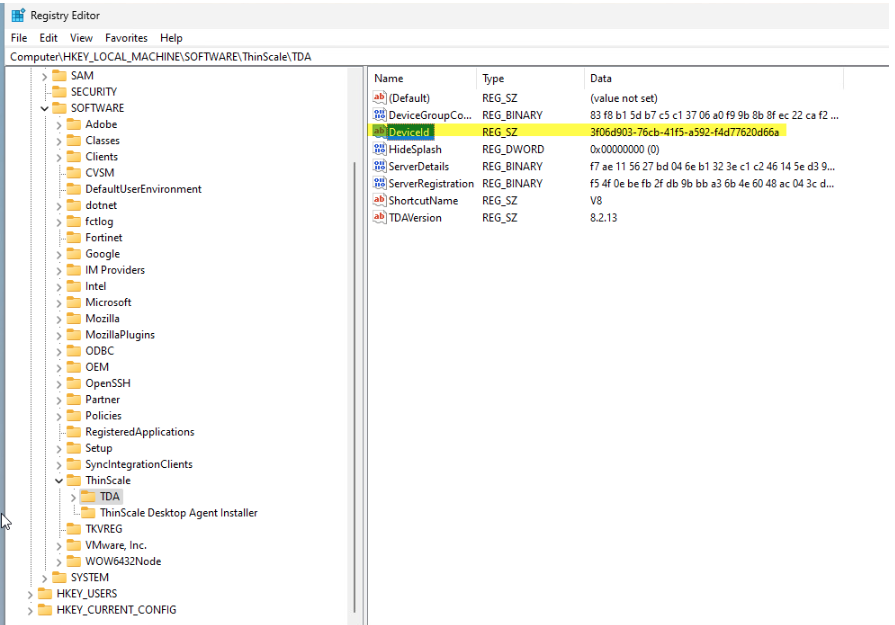
2. Use the Registry Editor to navigate to this location:
HKEY_LOCAL_MACHINE\SOFTWARE\ThinScale\TDA\
3. Then delete the "DeviceId" entry.
4. Close the Registry Editor and with the Device Registration reboot prompt still present, you can create your master image. When a cloned machine is booted up, it should prompt for your user's login with the Authentication Provider you assign.