Utilizing Copy File Software Package to Deploy File e.g. Image File for Custom Wallpaper
This Copy File package can be easily customized to transfer any type of file into the TK session

Written by
Last published at: January 2nd, 20241. For using image files, they'll first need to be present on the client machines, which we
can accomplish using a Software Package. If you already have images present on the
local clients already e.g. in their C drive and have no need to transfer files, please skip to step 7.
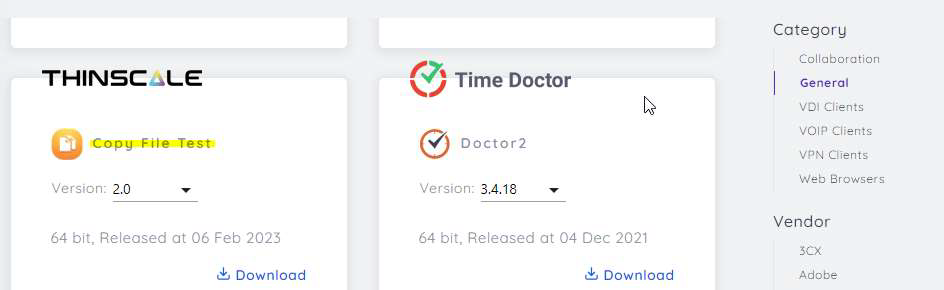
2. Please go to my.thinscale.com --> Software Packages --> General --> Copy File
Test (version 2) and download it.
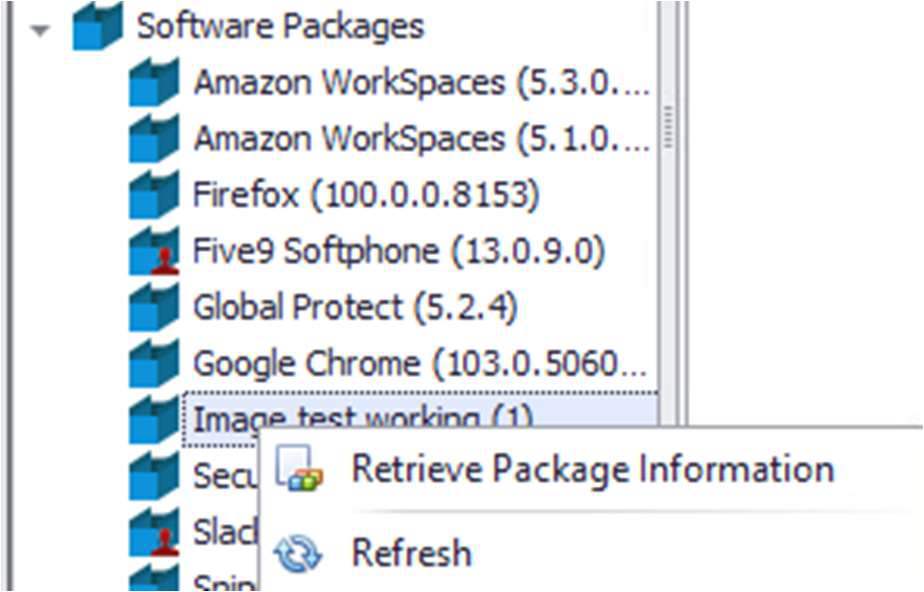
3. Next import it into your Management Console under Software Packages, and then right-click
and select “Retrieve Package Information” so that we can customize it.
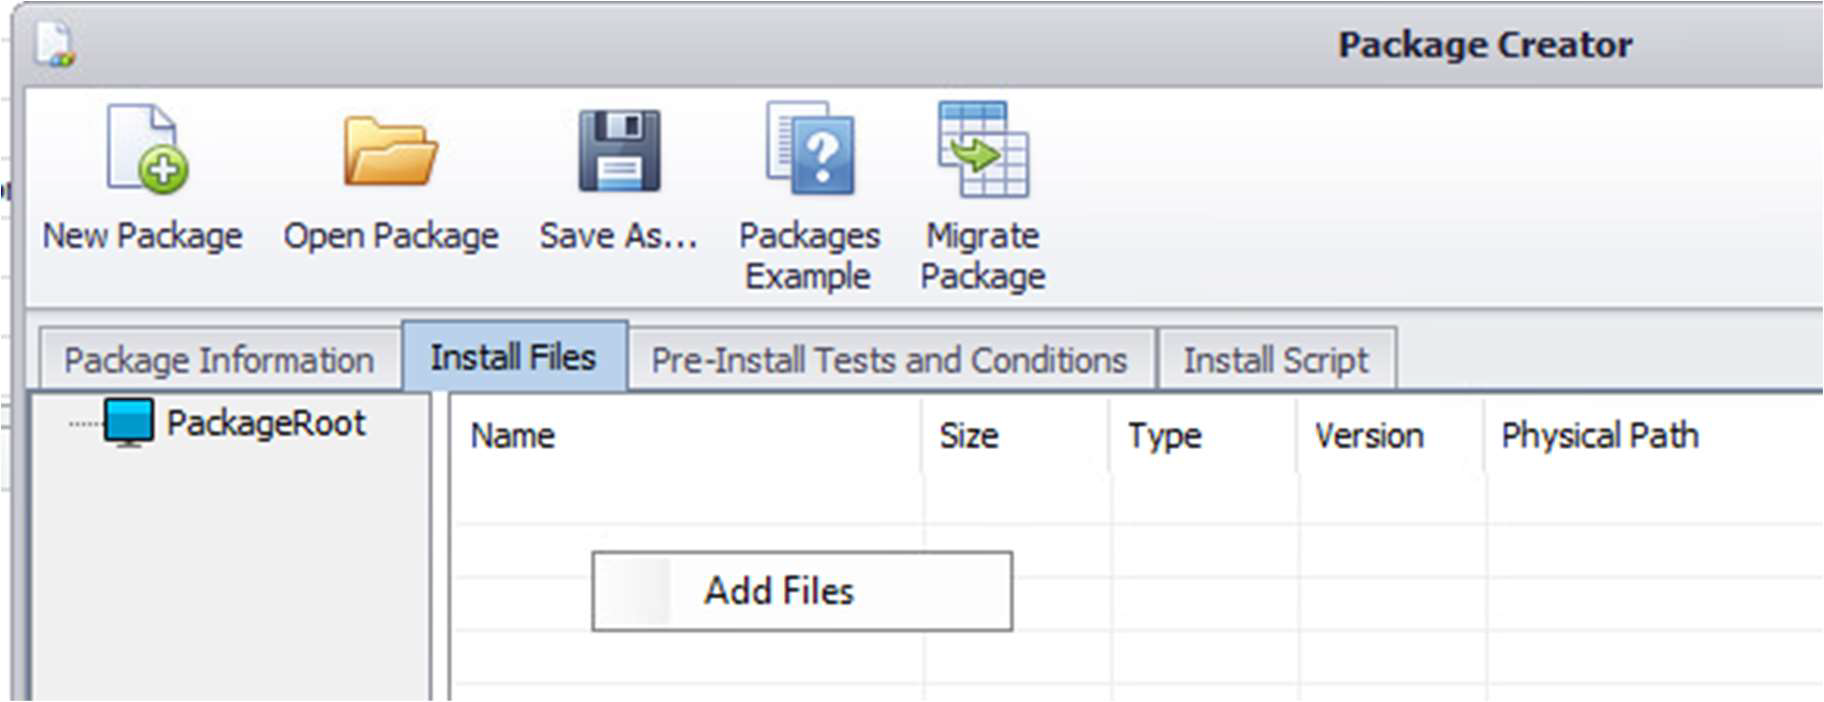
4. Under the “Install Files” tab, please remove the example file and replace it with the
intended file you’d like to use via right-click -->Add Files.
5. In my example, my image file is called darkchrome.png and I am intending on copying it
to the intended folder that will be created which will be \%localappdata%\images\
TK’s local Appdata folder, then a folder within I’m creating called images).
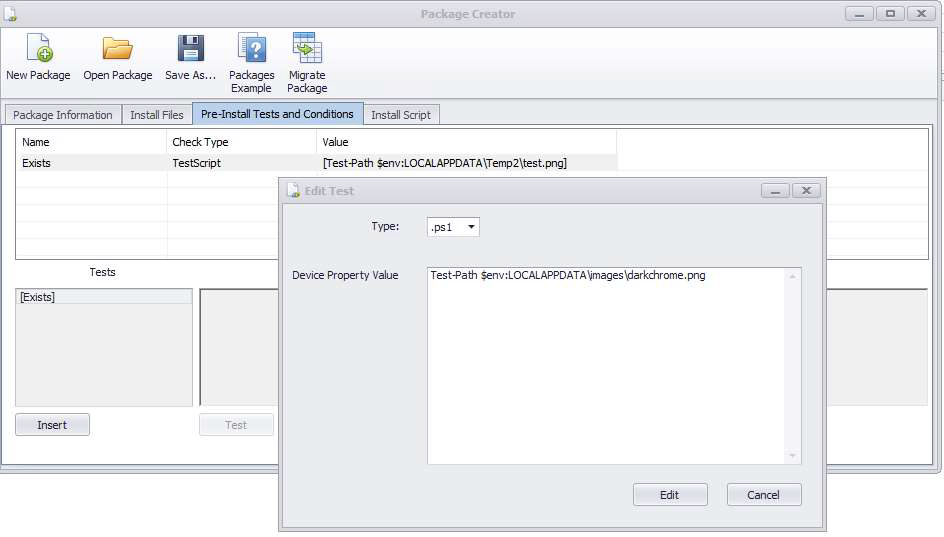
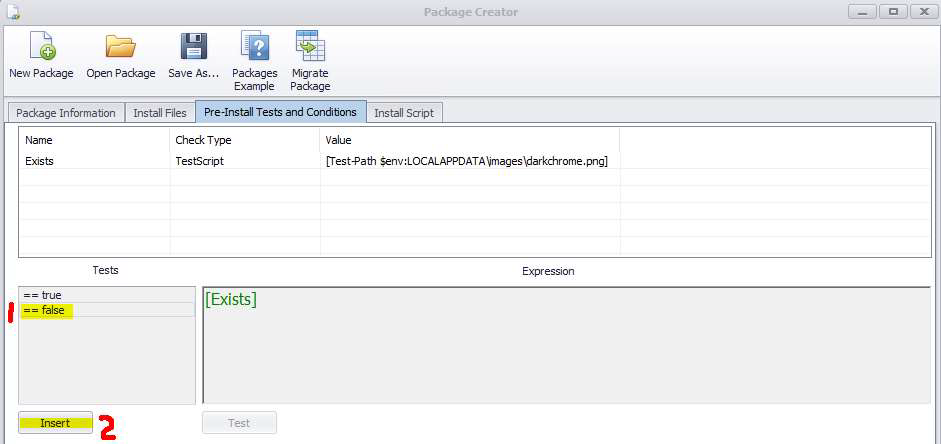
In a) below, I modified the example path and updated it accordingly under Pre-Install Tests
and Conditions with right-click -->Edit on the “Exists” test.
Then I re-inserted the “Exists” test as seen in b) below with “Exists ==False”. Pre-Install Tests are necessary so that it
will not unnecessarily copy the image each time the software is launched.
a)
b)
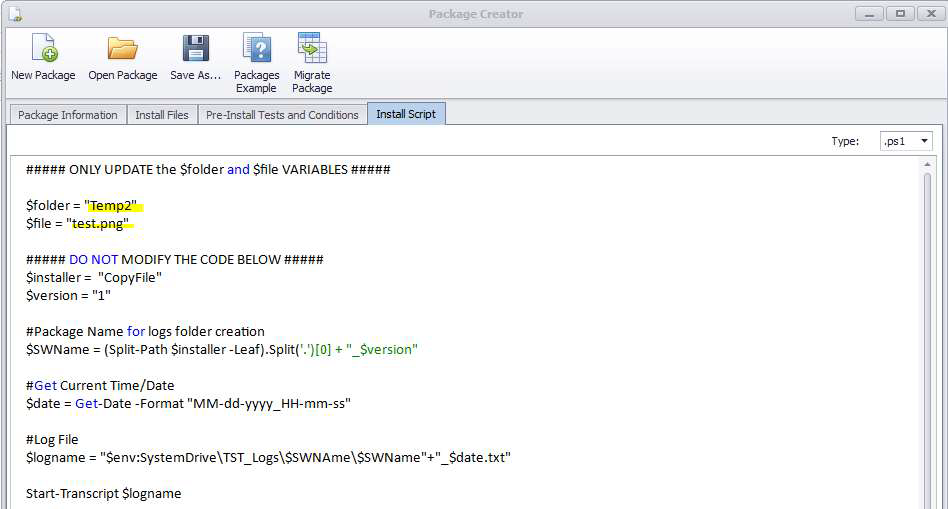
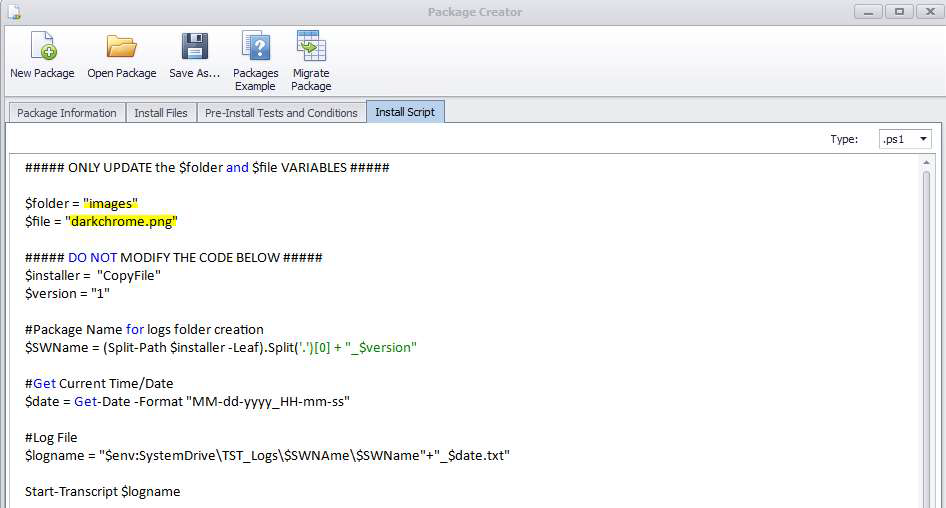
6. The final customization for the Image Copy package is to make sure the Install Script is
referring to the intended file and folder we are using. Before and after shown below:

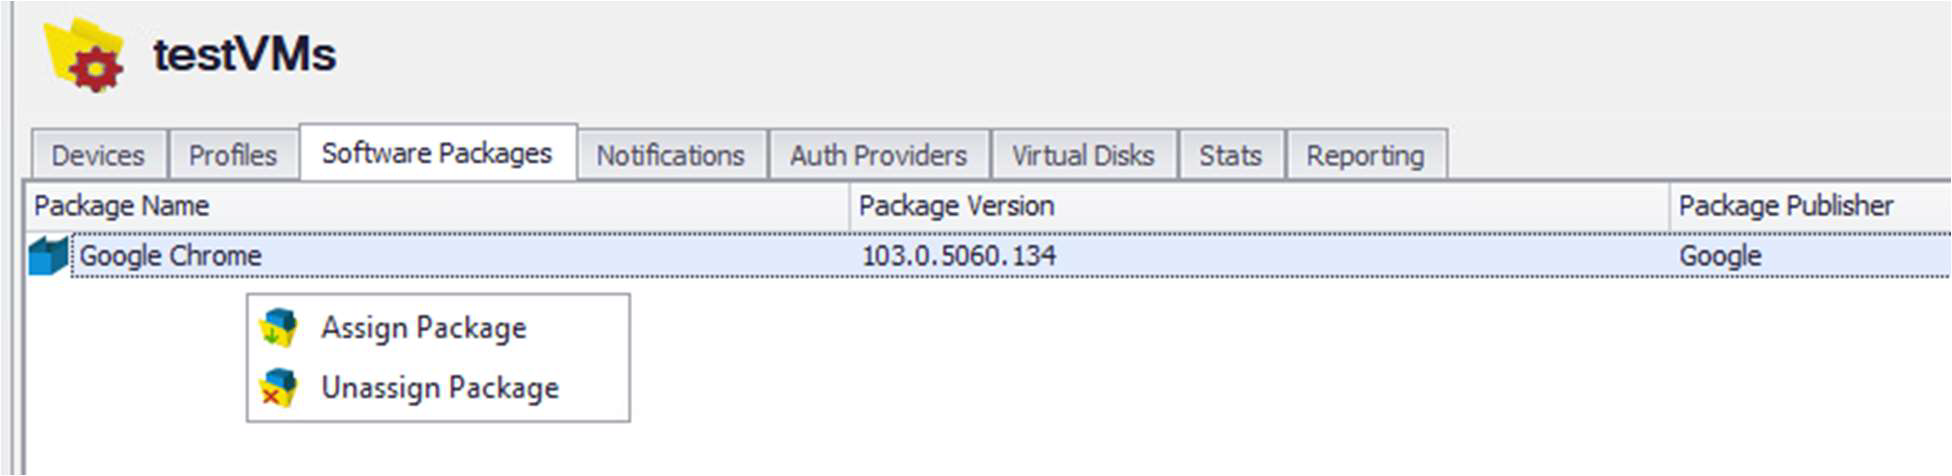
7. Please save the package and be sure to remove the original Image Copy template so
that the customized one will be used. Then assign it to the Software Packages tab of
your intended Device Folder so it can be deployed with right-click-->Assign Package
8.
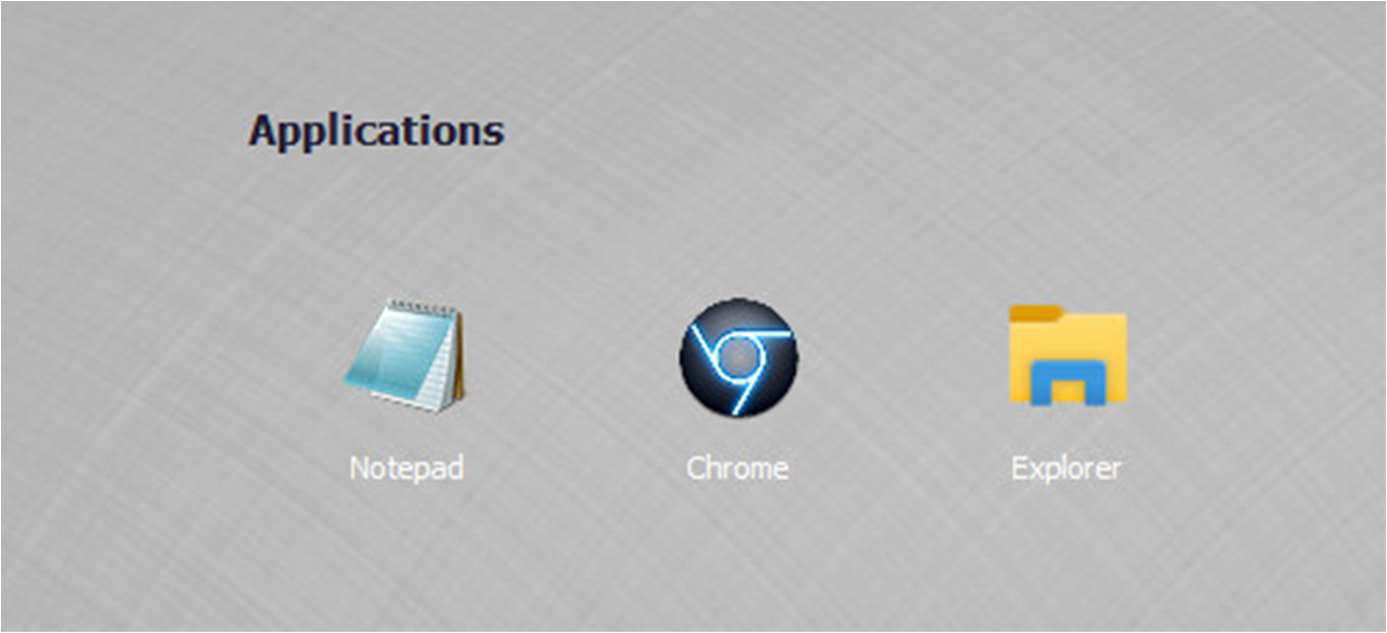
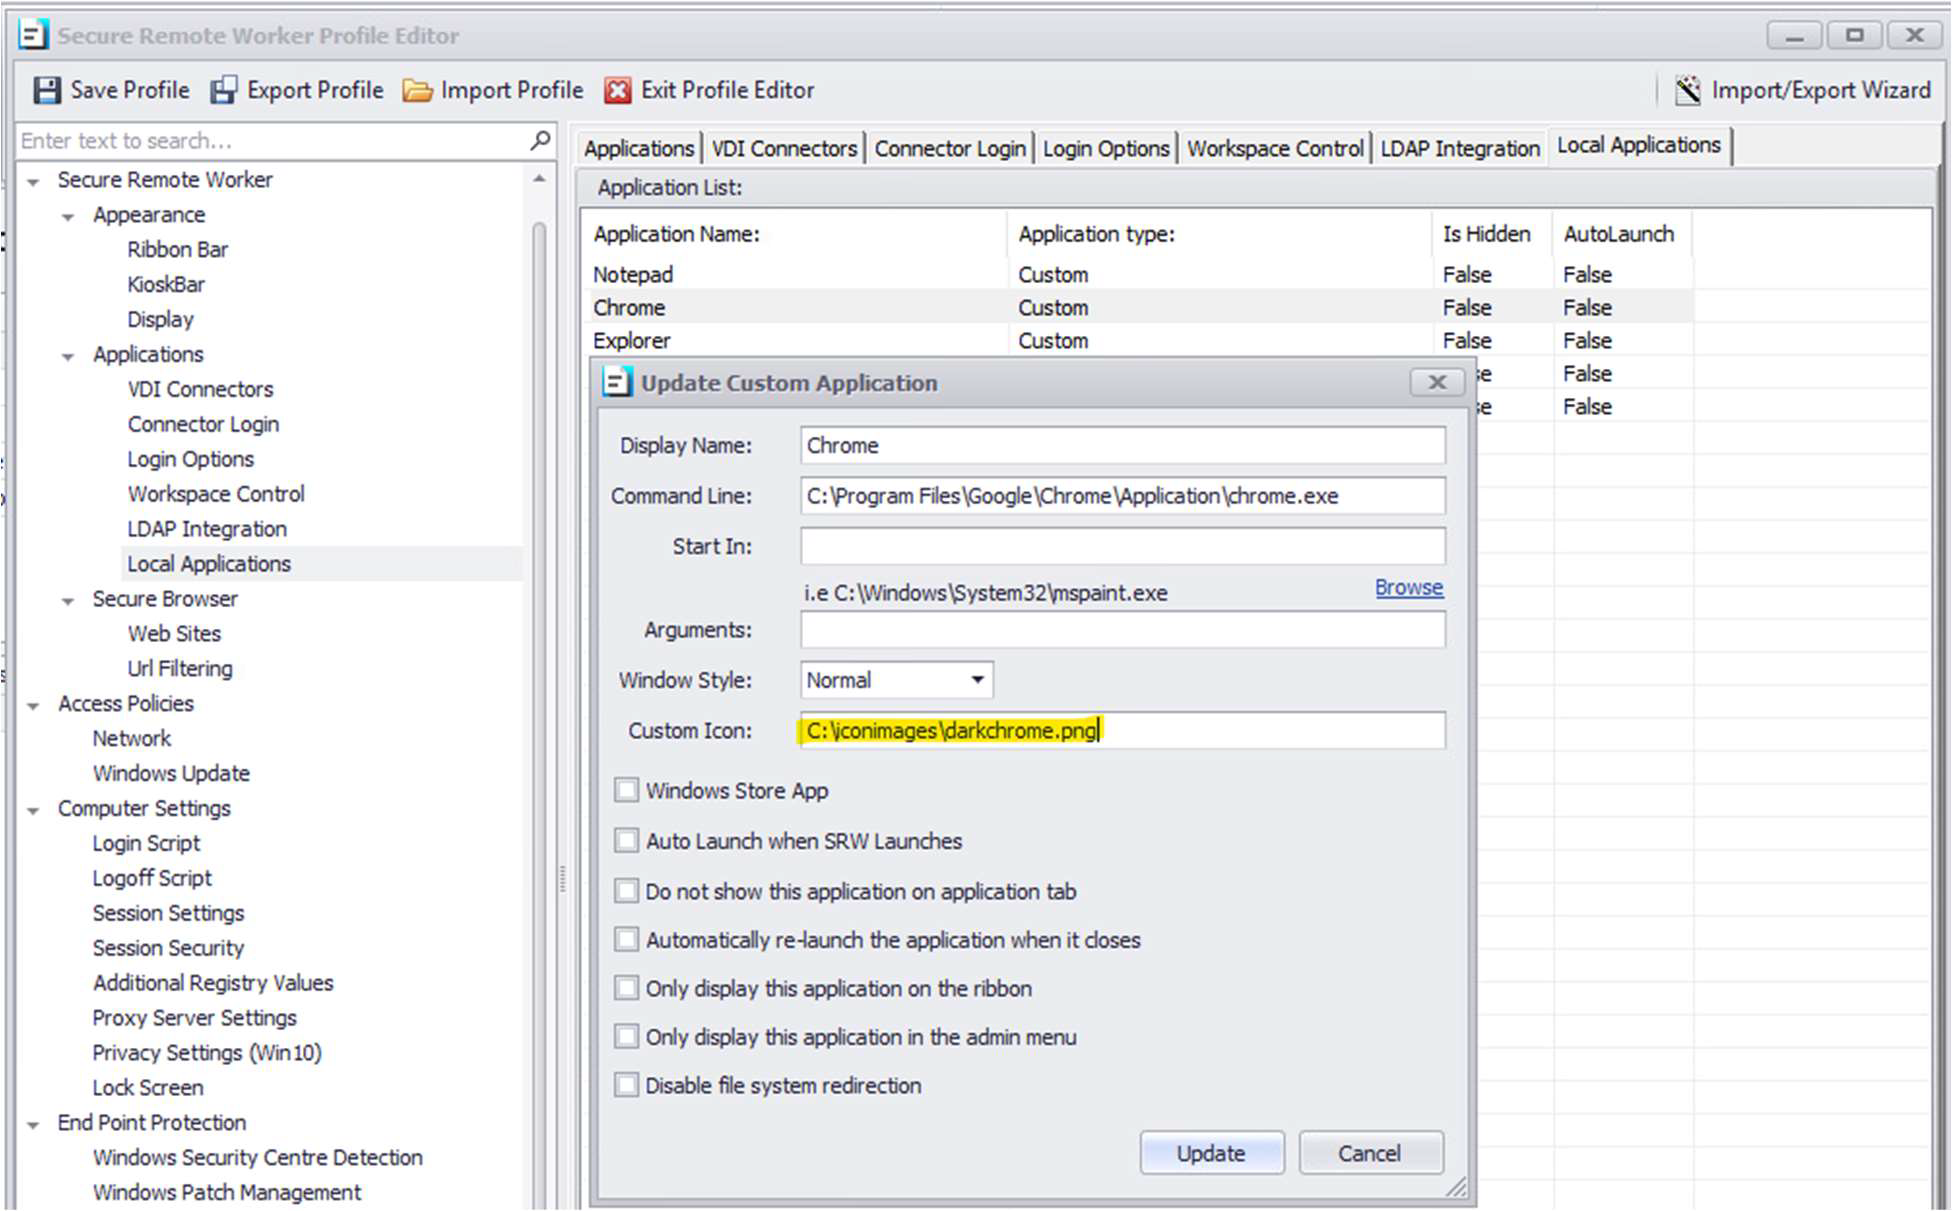
a. If you are wanting to use the image as a custom icon for a local application,
please open your profile-->Local Applications and edit the intended program so
that the custom icon can be called upon.
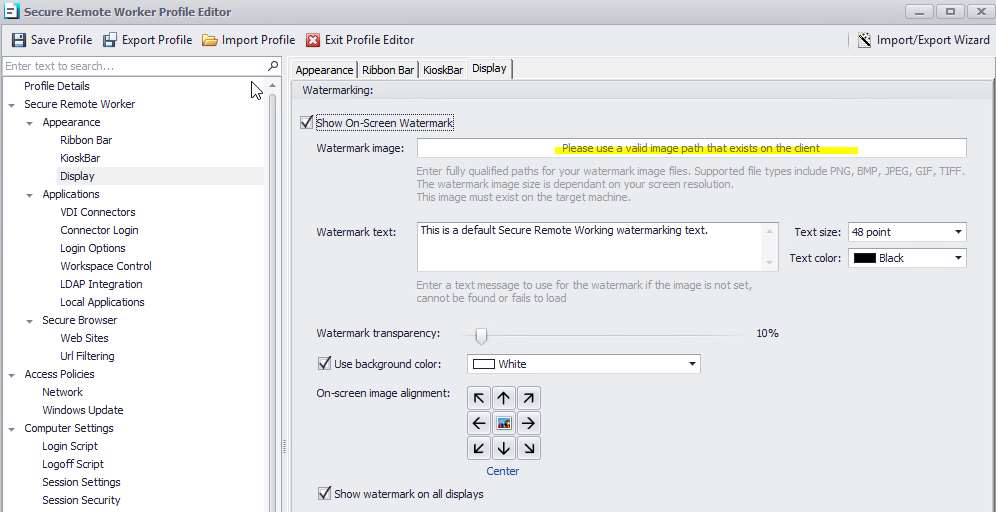
b. If you are wanting to use the image for a watermark, please open your profile,
select “Display” under appearance, and put in the path you used for your image.
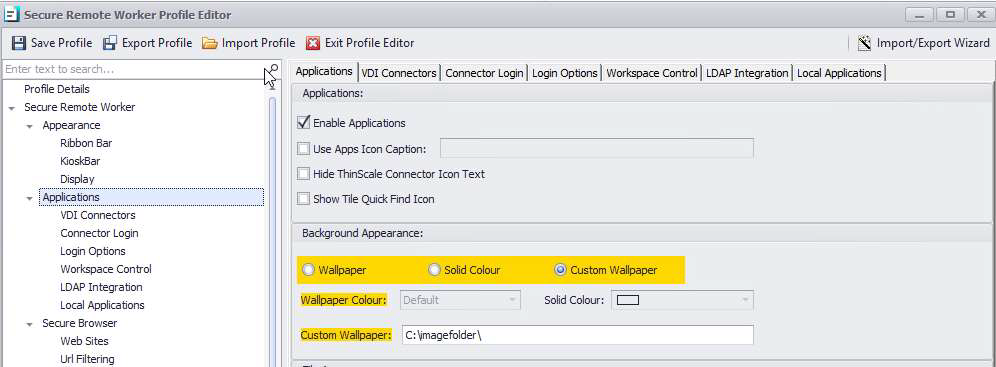
c. If you are wanting to use the image as wallpaper (background), please open your
profile, select “Applications”, select the radio button for Custom Wallpaper, and
put in the path you used for your image.
d. If you are wanting to use the image as a splash screen, please open your profile,
select “Appearance”, check the box for custom image, then put in the path you
used for your image.

9. After saving the profile, right-click on the device or device folder you’d like to deploy to
and choose Refresh Profile. Then next time the device runs it will start using your
custom-deployed image. (custom icon example shown below)