Secure Remote Worker Step-by-Step installation
This article will outline step-by-step the Secure Remote Workerinstallation. #SRW-KB2

Written by
Last published at: May 9th, 2023Note: Installation must be performed by a user with administrator privileges.
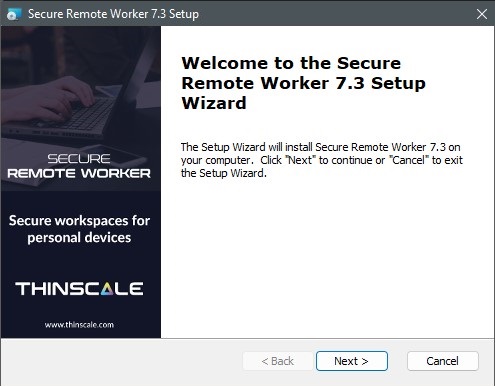
Copy the installation media to a temporary folder on a local drive on the server and run the installation media (SecureRemoteWorker-7.x.xx.msi)
Click ‘Next’
*Please note that the version number might be different
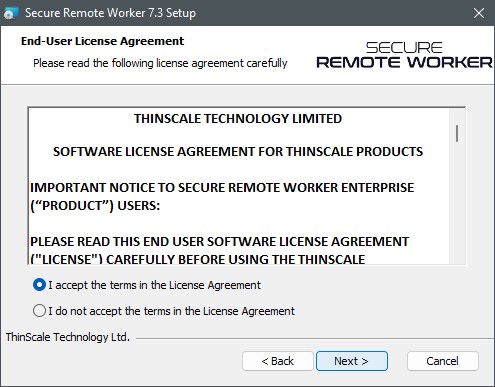
Accept the License Agreement and click ‘Next’
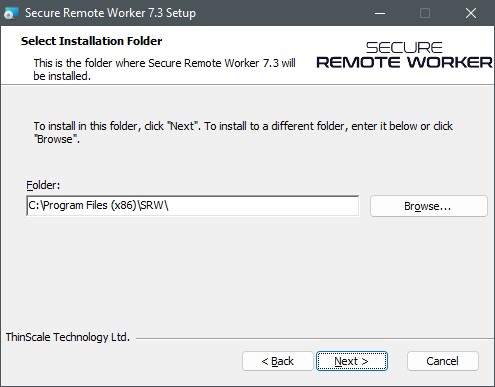
Click ‘Next’, or change the default installation directory if needed
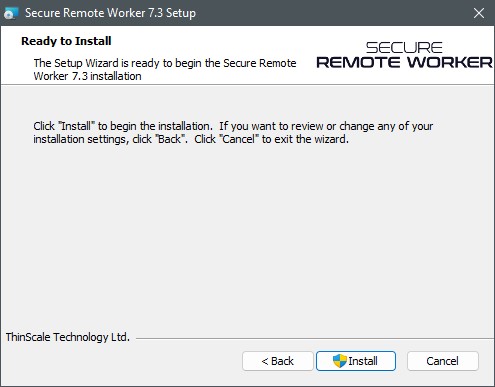
Click ‘Install’
During installation, the Secure Remote Worker Setup Wizard will launch. The details of the available configuration options can be found below.
Secure Remote Worker may prompt to restart the device if a reboot is required.
Connecting to a ThinScale Management Server
Please review the Management Server Step-by-step and Console installation prior to this step.
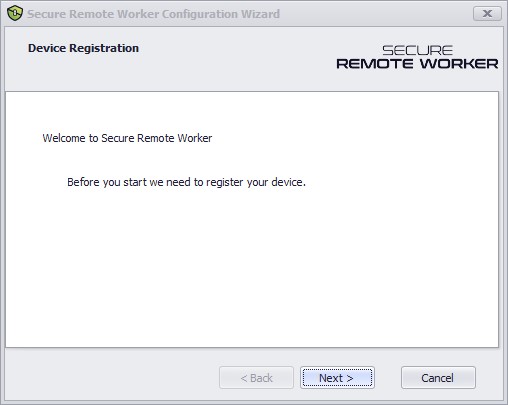
When you run Secure Remote Worker for the first time, it will prompt to register the device.
Click ‘Next’
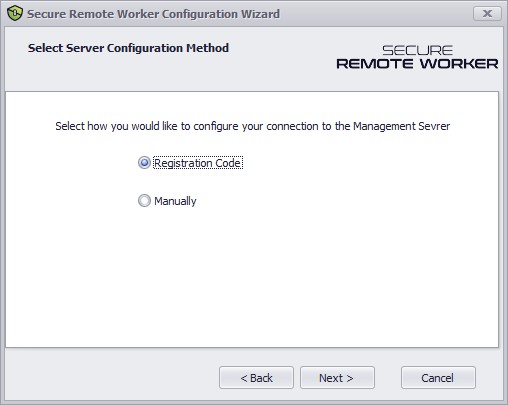
At this point, you have two options; for detailed information on how to use the ‘Registration Code’, please click HERE
Otherwise, select ‘Manually’ and click ‘Next’
If you're using a Default Site/Access Key
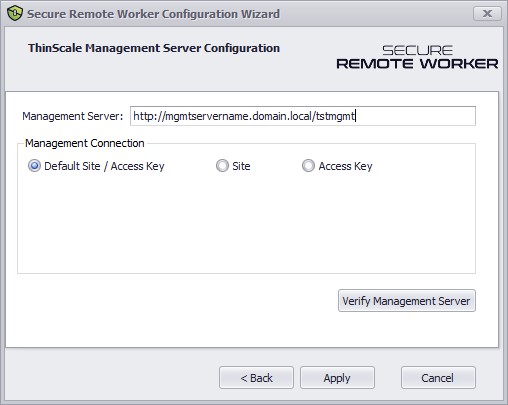
To connect to the ‘Default Site’ within the Management Console, select ‘Default Site / Access Key’ and enter the Management Server’s URI
If you're using Legacy Authentication
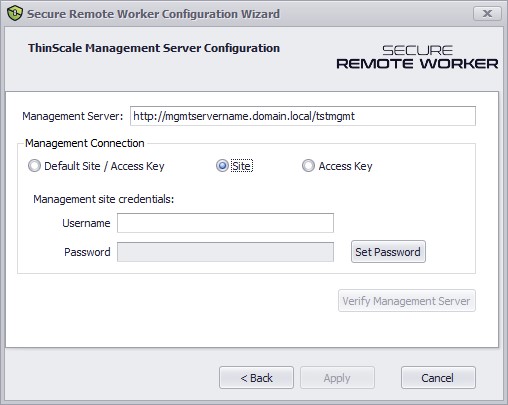
Legacy Authentication is the Username and Password that need to be enabled and filled in within the Access Key. You can use this if you want to connect to an alternative Access Key you have created, select ‘Site’ and enter the credentials of the site. For more info please have a look at this article.
If you're using a Registration Key
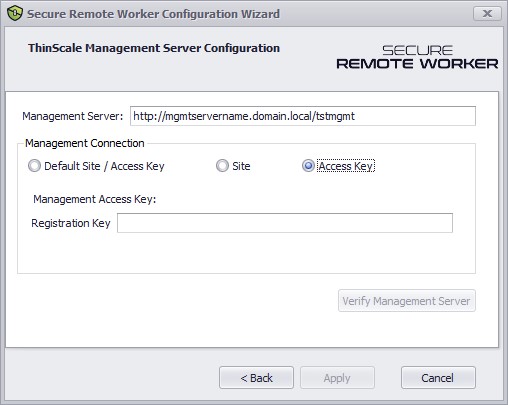
To use the custom Access Key, please select the last option and populate accordingly
If you're using a Registration Code
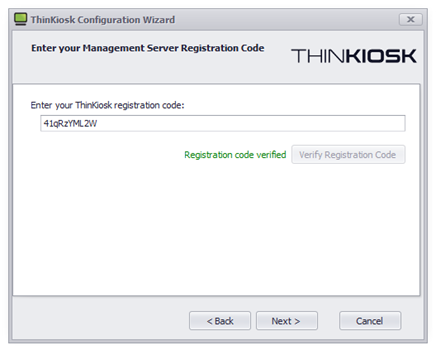
You can learn how to set up the registration code by reading the article New Portal Registration Code.
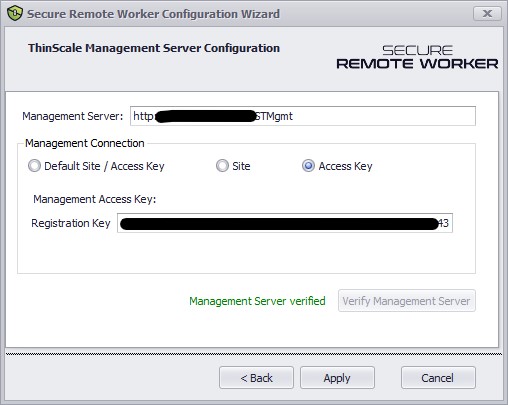
Click Verify Management Server. If the setup wizard can successfully connect to your Management Server using the details provided a ‘Management Server verified’ message will appear. If the connection is not successful a message detailing the failure reason will be shown.
The setup wizard will apply your configuration.
If the wizard succeeds it will automatically close upon completion.

If any of the configuration steps fail, you can view the setup log for detailed information about the step that failed.